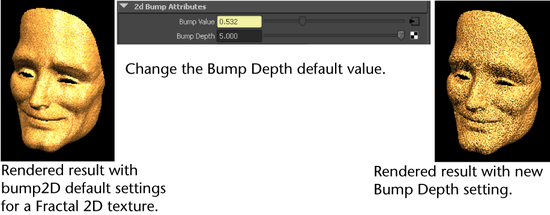
Converts a 2D texture to bump maps. Middle-drag the 2D texture swatch over the material swatch and select bump map from the pop-up menu. Maya creates the bump2d utility.
Find this utility in the Create Bar (see Hide, resize or customize the Create bar).
To use this utility, see Use the Bump 2d utility.
Controls how high the bumps display on the surface. Increase Bump Depth to make the surface bumpier. Decrease Bump Depth to make the surface smoother.

You can achieve almost identical effects by adjusting the Bump Depth or the Alpha Gain and Alpha Offset of the texture. The Bump Depth is determined by reading the alpha gain value of the texture. Both controls can be useful in complex shading networks where there may be multiple bumps. The alpha gain attribute lets you individually adjust the bump for each texture.
Affects the filtering level performed on a texture used as a bump map. Maya calculates the amount of filtering based on how much screen space the texture occupies in the final image. The Bump Filter attribute is a multiplier of that value.
Values greater than 1.0 produce more filtering, making the bumps smoother. Increase the value if aliasing occurs (jagged staircase effects) in final renderings, or if the bump map appears to pop or “sizzle” over the course of several frames.
Values less than 1.0 produce less filtering, making the bumps appear sharper. Decrease the value if bumps are too smooth in the final rendered images.
Affects the amount of filtering performed on a texture.
Unlike the Bump Filter attribute (which is a multiplier), Maya adds Bump Filter Offset to calculated filtering values. This increases the amount of filtering uniformly.
This attribute can be used to lock Maya’s filtering values. If you want the Bump Filter Offset value to completely determine the amount of filtering, set the Bump Filter attribute to 0.
 Except where otherwise noted, this work is licensed under a Creative Commons Attribution-NonCommercial-ShareAlike 3.0 Unported License