


You can add polygons to an existing mesh using the Extrude feature (Edit Mesh > Extrude). You can extrude polygon faces, edges, or vertices using the feature. For example, when you extrude a face on a polygon mesh the existing face telescopes inwards or outwards as it creates new connecting faces on the sides of the extrusion.

To extrude polygon faces or edges
The action creates an extrude node and switches to the Show Manipulator Tool.


You can use the Extrude tool controls to modify the Thickness, Offset and Divisions (see: Edit Mesh > Extrude) of the selected face or edge. Insert numerical values or use  or
or  to adjust the speed of changing the values.
You can turn the tool controls on or off by pressing + +  and then selecting Show Attribute Sliders from the marking menu.
Extruding edges can make your mesh non-manifold. Use Mesh > Cleanup to fix non-manifold geometry.
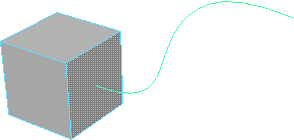
To extrude edges or faces along a path curve
 .
.
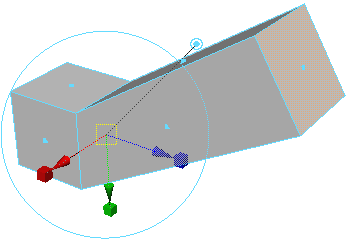
For example, increase Divisions so the extruded polygons better match the shape of the curve.
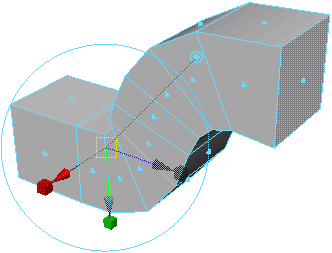
Reduce Taper so the extruded polygons gradually become narrower along the curve. (You can also use the Taper Curve controls to create more complex tapers.)

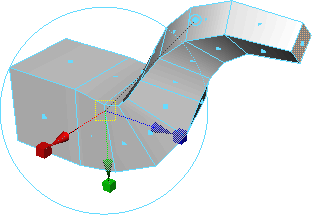
Adjust Twist so the extruded polygons rotate along the curve.
Vertices extrude along its vertex normal, creating additional faces for each face that shares the vertex.
.
Keeping faces together when extruding
The Keep Faces Together option (Edit Mesh > Keep Faces Together) controls how Extrude treats the edges of adjacent faces. When Keep Faces Together is on, the faces expand so their edges stay connected. When Keep Faces Together is off, Maya creates new polygons along the edges of the faces as they extrude.

 and choosing