The Trax Editor is a high-level animation tool that lets you select and control characters and their animation clips, layer and blend animation sequences, synchronize your animation and audio clips, and drag-and-drop animation clips between mapped characters. See Mapping animation between characters in the Character Setup guide. You can work with any type of animation in the Trax Editor—except motion path animation.
For example, suppose you keyframed a character’s walk and you now want to turn it into a walk cycle. You can create a clip for the keyframe animation sequence, scale and trim the clip to get it to be the right length and to have similar start and end poses, and then cycle the clip to create a proper walk cycle. If you wanted to change the walk cycle’s pace or rhythm, you can then create a time warp curve for the clip, or if you wanted to turn the walk into a march, you can manipulate the character and key into the clip directly. You can do all this to the character’s walk sequence without destroying the original keyframe animation because you are working with clips.

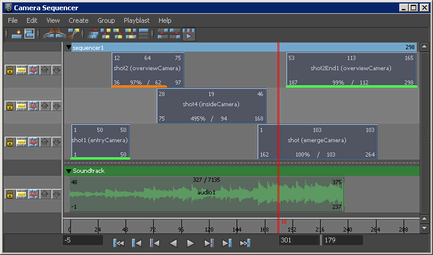
The Camera Sequencer is a tool that lets you create, re-arrange, and manipulate camera shots of your scene. Each shot defines which camera is active at any particular time, and for how long.
By adjusting the placement and timing of camera shots, you can effectively manage the ‘filming’ of the animation in the scene. When you finish manipulating camera shots in the Camera Sequencer, you can playblast the sequence into a rendered movie clip.
See also Camera Sequencer overview.

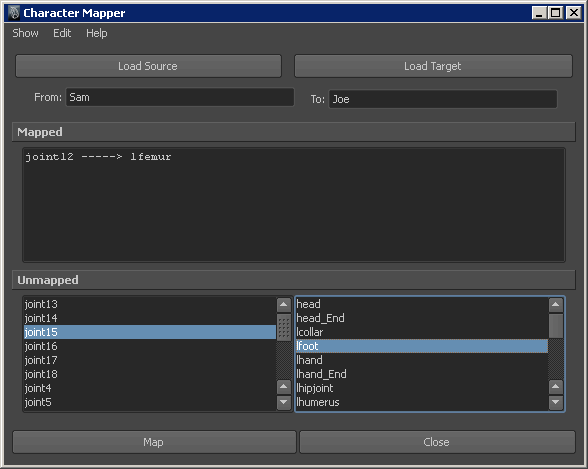
With the Character Mapper window you can create a correspondence between a source and target character’s nodes or attributes so that you can import and export or copy and paste animation clips between mapped characters in the Trax Editor.
What are the Visor, Outliner, and Clip Library?
When working with nonlinear animation, there are three ways you can access your clips:
See Source clips and Regular clips
Before you can drag and drop or copy and paste clips from one character to another, the characters must first be mapped. See Mapping animation between charactersin the Character Setup guide.

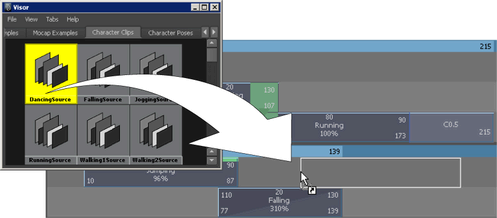
The Visor lists all the source clips in your scene as icons. You can select a clip icon in the Visor, and then  -drag the clip onto a character in the track view area. Dragging a clip from the Visor onto a character in Trax adds a copy of the selected clip to that character. See Use the Visor with Trax and Visor in the Basics guide.
The Visor has four tabs that let you view your scene’s nonlinear animation data. You can access all source clips and poses in your scene from the Character Clips,Character Poses, Unused Clips, and Unused Poses tabs. All the clips that are used by characters in your scene appear in the Character Clips and Character Poses tabs. All the clips and poses that are present in your scene, but are not used by a character, appear in the Unused Clips and Unused Poses tabs.

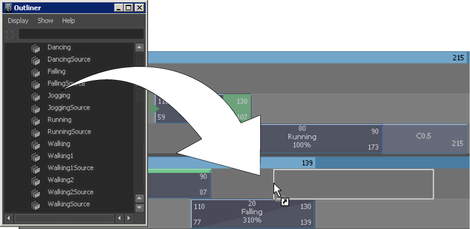
The Outliner lists all the source and regular clips that are in your scene as text. You can select a clip name in the Outliner, and then  -drag the clip onto a character in the track view area. Dragging a clip from the Outliner onto a character in Trax adds a copy of the selected clip to that character. See Use the Outliner with Trax, Use the Visor with Trax, and Visor in the Basics guide.
The Clip Library is a menu in the Trax Editor that lets you create copies of source clips and poses for all the characters loaded in Trax. When you select a source clip or pose from the Library, a copy of the selected clip or pose is created and inserted into its respective character in Trax. For more information, see Copy source clips to a character and clipLibrary.