To set the settings
- In the menu set, select >
 .
.
The settings appear.
- In the section, set the axis of symmetry by selecting , , or from the drop-down list.
Symmetry is by default.
To create symmetric joint(s)
- Click the location in the model where you want to place your joint.
TipTurn on

before creating a joint to automatically center it in your model.
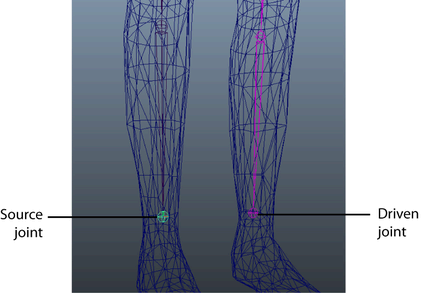
The first joint, the source joint, is created. A second joint, the driven joint, is also created and is constrained to the
source joint by a symmetry connection.
NoteIn the current implementation, the , , , , and attributes are connected. All other joint attributes are not connected and stay independent.
All driven joints and joint chains appear pink so they can be easily identified.
- Click again in your model where you want to create the next joint in your joint chain.
A bone appears between the first and second joints.
TipUse Insert to move the active joint during creation.
- Continue clicking until you create all the joints for your joint chain.
- Press
 (Windows and Linux) or
  (Mac OS X) to complete your joint chain.
Now when you modify the source joint, the driven joint updates symmetrically.
 .
.
 before creating a joint to automatically center it in your model.

 (Windows and Linux) or
  (Mac OS X) to complete your joint chain.