Projects UV texture coordinates onto the selected object from multiple angles simultaneously. An Automatic Mapping Projection Manipulator is displayed around the selected object to facilitate more accurate UV projection.
Create UVs > Automatic Mapping > 
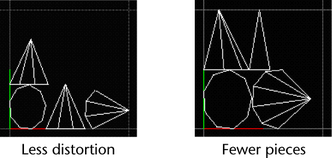
Selects the number of planes for the Automatic Mapping projection. You can choose a projection mapping based on shapes with 3, 4, 5, 6, 8 or 12 planes. The more planes used, the less distortion occurs and the more UV shells created in the UV Texture Editor. The number of planes that appear on the Automatic Mapping Projection manipulator directly relates to the number of planes set in this option.
Sets the optimization type for the automatic projection.
Projects each plane until the projection encounters a projection angle that is not ideal. This can result in larger shells, and fewer of them. This is the default.

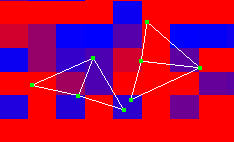
In some cases, setting the Optimize for setting to Less Distortion can produce a slightly different UV layout when you open the same file on another operating system. If this happens you can either:
The Insert projection before deformers option is relevant when the polygonal object has a deformation applied to it. If the option is turned off and the deformation is animated, the texture placement is affected by the change in vertex positions. This leads to “swimming” textures.
Turning this option on applies the texture placement to the polygonal object before the deformation is applied to it. Basically, the texture placement dependency graph node is inserted before the deformer dependency graph nodes and the texture “sticks” to the geometry even after the deformation.
Lets you specify a custom polygon object to be the projection object for automatic mapping. You must initially create the polygon object in object space (X, Y, Z). The Load Projection object must exist in the current scene. The projection object can form a cage around the object or be comprised of separate faces that intersect each other at its center. The faces of the projection object must have UV texture coordinates. It is recommended that you use separated faces. You can separate the faces for a polygon primitive using the Mesh > Extractfeature. NURBS and subdivision surfaces are not valid surface types for use with Load Projection. The maximum number of polygon faces that can be specified for a projection object is 31.
You can translate any face from the Load Projection object along its normal with no affect on the resulting projection. However, scaling or rotating any face from the Load Projection object affects the resulting orientation and scale of the final UV projection. Changing the UV texture coordinates on the projection object also affects the resulting UV projection mapping that occurs. The Automatic Mapping projection manipulator updates to reflect the change in orientation whenever this occurs.
Identifies the currently loaded projection object in the scene. You specify the projection object by typing the name of the projection object in this field. Alternatively, the name of the projection object will appear in this field when the desired object in the scene is selected and the Load Selected button is selected.
Loads polygon faces that are currently selected in the scene as the specified projection object. The specified faces are used to update the automatic projection manipulator. While the maximum number of polygon faces that can be specified for a projection object is 31, the recommended range is between 3 and 8.
When Project both directions is off (default), Load projection projects UVs on polygon objects whose normals point in roughly the same direction as the projecting plane of the Load Projection object. When Project both directions is turned on, the alignment of normals on both sides of the projection faces determines which objects will receive a projection from a particular projection plane. That is, the normals are projected outwards from both sides of the Load Projection object and the surfaces whose normals align are evaluated accordingly.
Determines how the UV shells get stacked in relation to each other when laid out in the UV Texture Editor.
Maya puts a bounding box around each piece and lays out the shells so that the bounding boxes are very close together. If the shells end up positioned exactly next to each other, two UVs on different shells can share the same pixel and when painting with the 3D Paint Tool, overscanning can also cause the paint to spill onto the adjacent shell.

To avoid this situation, ensure that there is at least a pixel between the bounding boxes by selecting a spacing preset from this menu. Select a preset that corresponds to your texture map size. If you don’t know the size, select a smaller map, which will result in a larger spacing between adjacent shells in UV space. (The smaller your map in pixels, the bigger the UV spacing must be between bounding boxes.)
Select Custom to set the size of the space as a percentage of the map size (in the Percentage Space box).