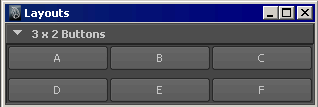
布局是指包含和排列其他 UI 元素的 UI 元素。它们是在 ELF 窗口中控制格式的基本方法。存在许多不同的专用布局,可以特定方式排列其内容。例如,列布局会在单个列中以垂直方式逐一排列其内容(如列表),但行布局会以水平方式逐一排列其内容。对于其他的排列方案,存在其他的布局。布局可以包含其他布局,以实现多种不同的外观。创建布局的所有命令均以“Layout”作为结尾;例如,“gridLayout”。
要获得可用布局的列表,请参见“按功能列出的命令列表”中的“UI:布局”区域。

“frameLayout”、“tabLayout”和“menuBarLayout”命令有一些额外功能与定位其子项没有必然的关系。
框架布局包含一个展开/收拢选项,在该选项中,布局标题旁边有一个按钮,可用于切换布局的状态。当布局处于收拢状态时,框架布局的内容会被隐藏,并且布局收拢后所占用的空间极少。仅当通过可见界面(例如用户可以单击的小箭头图标)收拢或取消收拢布局时,才调用用于展开或收拢布局的 frameLayout 回调。使用如下代码将不会调用回调:
frameLayout -e -collapse true $theFrame;
要在首次创建窗口时能够进行正确设置而不会进入无限循环,使回调以该种方式工作是唯一的方法。如果需要执行回调并且您知道该回调是安全的,则在执行收拢或展开的同时可直接调用该回调。
“formLayout”是功能较强大的布局之一。该布局支持对子控件的绝对和相对定位。例如,可以指定某个控件的位置保持不变,而其尺寸是相对于窗口大小的。以下示例可以有力地证明这个概念。
window -widthHeight 300 200 TestWindow2;
 string $form = `formLayout -numberOfDivisions 100`;
 string $b1 = `button -label "A"`;
 string $b2 = `button -label "B"`;
 string $b3 = `button -label "C"`;
 string $b4 = `button -label "D"`;
 string $b5 = `button -label "E"`;
 formLayout -edit
 -attachForm $b1 "top" 5
 -attachForm $b1 "left" 5
 -attachControl $b1 "bottom" 5 $b2
 -attachPosition $b1 "right" 0 75
 -attachNone $b2 "top"
 -attachForm $b2 "left" 5
 -attachForm $b2 "bottom" 5
 -attachForm $b2 "right" 5
 -attachOppositeControl $b3 "top" 0 $b1
 -attachPosition $b3 "left" 5 75
 -attachNone $b3 "bottom"
 -attachForm $b3 "right" 5
 -attachControl $b4 "top" 0 $b3
 -attachOppositeControl $b4 "left" 0 $b3
 -attachNone $b4 "bottom"
 -attachOppositeControl $b4 "right" 0 $b3
 -attachControl $b5 "top" 0 $b4
 -attachOppositeControl $b5 "left" 0 $b4
 -attachNone $b5 "bottom"
 -attachOppositeControl $b5 "right" 0 $b4
 $form;
showWindow TestWindow2;
在生成的窗口中,按钮 A 固定到窗口的左上角,而其底边连接到按钮 B,其右边也连接到按钮 B,以便按钮 A 的宽度占窗口宽度的 75%。通过这些连接,在调整窗口大小时,按钮 A 将相应地增大或缩小。另请注意,按钮 D 和 E 上的连接会将其左边和右边与上方的按钮对齐。
大部分 formLayout 连接标志都会按预期运行。需要对 AttachOppositeForm 和 attachOppositeControl 进行一些额外说明。将子控件添加到表格中时,虽然没有位置,但有顺序,因此具有相对于彼此的暗含位置。就 attachControl 标志而言,第二个子控件顶部要连接到的“自然”位置为第一个子控件的底部。第二个子控件的左边要连接到的“自然”位置为第一个子控件的右边。
因此,在某种意义上,第二个子控件位于第一个子控件的右下方,第三个子控件位于第二个子控件的右下方,依此类推。
现在,假设要使第二个子控件附加到第一个子控件的旁边且必须为相对附件,以便子控件 2 在表格大小发生更改时仍保留在子控件 1 的旁边。通过常规 attachControl,可以将子控件 2 的左侧边连接到子控件 1 的右侧边,attachControl child2 “left” 0 child1; 表明要将子控件 2 的左侧边附加到子控件 1 的左右方向中距离“最近”的边,间距偏移为 0 像素。请记住,隐式顺序会直接将子控件 2 定位到子控件 1 的右边,因此“最近”边为子控件 1 的右边。
但是,attachControl 会因遵循暗含顺序而无法使子控件 2 的顶部与子控件 1 的顶部对齐。此时应使用 attachOppositeControl。
attachOppositeControl child2 "top" 0 child1;
以上代码说明要将子控件 2 的顶边附加到距离 child2 顶部边缘最远的子控件 1 的边缘,间距偏移为 0 像素。表格知道要并列放置具有相同顶边位置的两个对象。
window TestWindow3;
string $form = `formLayout`;
string $b1 = `button -label "AAAAAAAAA"`;
string $b2 = `button -label "BBBBB"`;
string $b3 = `button -label "CCCC"`;
formLayout -edit
 -attachForm $b1 "top" 5
 -attachForm $b1 "left" 5
 -attachControl $b2 "top" 0 $b1
 -attachControl $b2 "left" 5 $b1
 -attachNone $b2 "right"
 -attachNone $b2 "bottom"
 -attachControl $b3 "top" 0 $b2
 -attachControl $b3 "left" 0 $b2
 -attachNone $b3 "right"
 -attachNone $b3 "bottom"
 $form;
showWindow TestWindow3;
接下来,会看到 attachOppositeControl 标志对第二个按钮的位置所执行的操作。只要第一个按钮附加到表格的顶部,attachOppositeControl 的使用方法就会与执行 attachForm $b2 “top”的方法相同。如果相对于可移动的控件附加了按钮 1,则此处必须使用 attachOppositeControl。
window TestWindow4;
string $form = `formLayout`;
string $b1 = `button -label "AAAAAAAAA"`;
string $b2 = `button -label "BBBBB"`;
string $b3 = `button -label "CCCC"`;
formLayout -edit
 -attachForm $b1 "top" 5
 -attachForm $b1 "left" 5
 -attachOppositeControl $b2 "top" 0 $b1
 -attachControl $b2 "left" 5 $b1
 -attachNone $b2 "right"
 -attachNone $b2 "bottom"
 -attachControl $b3 "top" 0 $b2
 -attachControl $b3 "left" 5 $b2
 -attachNone $b3 "right"
 -attachNone $b3 "bottom"
 $form;
showWindow TestWindow4;
现在,我们在其他方向使用 attachOppositeControl,使第三个按钮直接位于第二个按钮下合适的位置。
window TestWindow5;
string $form = `formLayout`;
string $b1 = `button -label "AAAAAAAAA"`;
string $b2 = `button -label "BBBBB"`;
string $b3 = `button -label "CCCC"`;
formLayout -edit
 -attachForm $b1 "top" 5
 -attachForm $b1 "left" 5
 -attachOppositeControl $b2 "top" 0 $b1
 -attachControl $b2 "left" 5 $b1
 -attachNone $b2 "right"
 -attachNone $b2 "bottom"
 -attachControl $b3 "top" 0 $b2
 -attachOppositeControl $b3 "left" 0 $b2
 -attachNone $b3 "right"
 -attachNone $b3 "bottom"
 $form;
showWindow TestWindow5;
要使第三个按钮在第一个按钮下与之对齐,并延伸至第二个按钮的左侧边,请执行以下代码:
window TestWindow6;
string $form = `formLayout`;
string $b1 = `button -label "AAAAAAAAA"`;
string $b2 = `button -label "BBBBB"`;
string $b3 = `button -label "CCCC"`;
formLayout -edit
 -attachForm $b1 "top" 5
 -attachForm $b1 "left" 5
 -attachOppositeControl $b2 "top" 0 $b1
 -attachControl $b2 "left" 5 $b1
 -attachNone $b2 "right"
 -attachNone $b2 "bottom"
 -attachControl $b3 "top" 0 $b2
 -attachForm $b3 "left" 5
 -attachControl $b3 "right" 0 $b2
 -attachNone $b3 "bottom"
 $form;
showWindow TestWindow6;
既然“attachForm $b3 “left” 5”将按钮 3 放置到按钮 2 的左边,则现在“-attachControl $b3 “right” 0 $b2”的最近一侧为按钮 2 的左边。最后,我们要使第三个按钮从按钮 1 的左边运行到按钮 2 的右边。
window TestWindow7;
string $form = `formLayout`;
string $b1 = `button -label "AAAAAAAAA"`;
string $b2 = `button -label "BBBBB"`;
string $b3 = `button -label "CCCC"`;
formLayout -edit
 -attachForm $b1 "top" 5
 -attachForm $b1 "left" 5
 -attachOppositeControl $b2 "top" 0 $b1
 -attachControl $b2 "left" 5 $b1
 -attachNone $b2 "right"
 -attachNone $b2 "bottom"
 -attachControl $b3 "top" 0 $b2
 -attachOppositeControl $b3 "left" 0 $b1
 -attachOppositeControl $b3 "right" 0 $b2
 -attachNone $b3 "bottom"
 $form;
showWindow TestWindow7;