For a description of the utility, see Bump 2d.
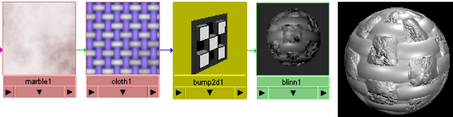
To bump map layered textures using
- Map a 2D texture to a material’s attribute.
- Map a 3D texture to one of the 2D texture’s attributes (such as V Color).
- Double-click the bump2d swatch in the to open the bump2d’s and turn on. Maya bump maps both textures.
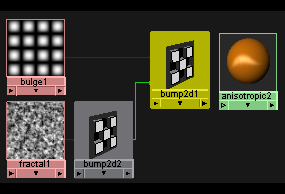
To cascade, or stack, bump maps
- In the , create two 2D textures and a material.
- Create a utility node.
- Middle-drag the first 2D texture swatch over the utility swatch.
- Create another node and middle-drag the second 2D texture swatch over the new utility swatch.
- Middle-drag this swatch over the first swatch.
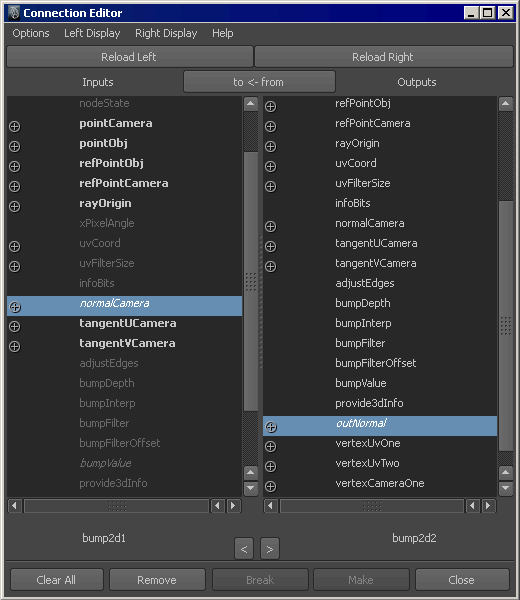
The appears.
- From the menu, select .
- From the menu, select .
- Select from the column and the from the column.
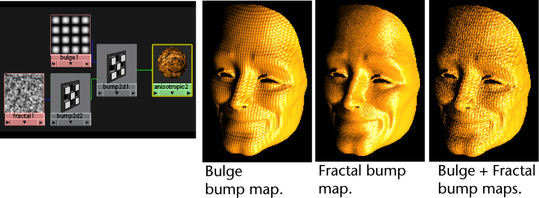
- In , middle-drag the first utility swatch over the material swatch to assign both bump maps to a material’s attribute.
TipIf you bump-map a material that uses environment maps, connect the attribute of the bump node to the attribute of the texture, as well as to the attribute of the material. Otherwise, the environment does not reflect correctly in bumpy areas.
Maya provides a MEL script that does this for you. After you connect the of the environment map to the of the material, type cnctBumpProjNormal shader-name in the command line (where shader-name is the name of the material).
To delete a bump2d map
- Open the material’s .
- Right-click the word .
- Select from the pop-up menu.