For all static per particle attributes, Maya keeps a corresponding attribute with a name ending in 0. For example, the static attributes position, velocity, and acceleration have counterparts position0, velocity0, and acceleration0.
An attribute name that ends in 0 holds the initial state value of the attribute. When you save a particle object’s current attribute values for initial state usage, Maya assigns those values to the initial state attributes.
To save a particle object’s attribute values for initial state usage, use either of these commands from the Dynamics menu set:
This saves all per particle attribute values for the selected particle shape node or rigid body.
This saves all per particle attribute values for all dynamic objects in the scene—in other words, all particle shape nodes and rigid bodies.
When you dynamically add a per particle attribute by clicking one of the buttons in the Add Dynamic Attributes section of the Attribute Editor, Maya also adds a corresponding initial state attribute with name ending in 0. For example, when you click the Opacity button in the Attribute Editor and add a per particle opacity attribute, Maya also adds opacityPP0.
Though an initial state attribute doesn’t appear in the Expression Editor, you can read its value, for example with a print statement, to retrieve the initial state.
When you use the Add Attribute window to add a custom per particle (array) attribute to a particle shape, you must choose whether you want to add it with Add Initial State Attribute on or off. If you choose on, Maya creates a corresponding initial state attribute for the added attribute.
If you choose off, Maya doesn’t create a corresponding initial state attribute for the added attribute. Without this corresponding attribute, you can’t save a particle object’s current attribute values for initial state usage. You must write a creation expression if you decide to initialize the custom attribute’s value upon rewinding the animation.
A per particle attribute is called an array attribute in the Add Attribute window. The two terms have the same meaning. See Assign to a custom attribute for details.
You can see whether a custom attribute was added with Add Initial State Attribute on or off by using the Maya listAttr command. (See the MEL Command Reference for details.)
You might want to read the value of an initial state attribute in an expression, for instance, to use its original (rewind) value for some calculation. If you assign a value to an initial state attribute. Maya will overwrite the value if you save the attribute value for initial state usage.
When you add a custom attribute to a particle shape, do not end the name with a 0 character. You’ll subvert Maya’s naming scheme for the initial state attribute associated with an attribute.
For any attribute, if you don’t initialize its value with a creation expression or save its value for initial state usage, Maya gives the attribute a default value at the animation’s first frame. It typically assigns the attribute the value 0 or <<0,0,0>>, as appropriate for the data type. In other cases, for instance, opacityPP and opacity, Maya assigns the attribute a default value of 1.
If you know you’re going to write a creation expression for a custom attribute, you can set Add Initial State Attribute off when you add the attribute. Otherwise, set Add Initial State Attribute on whenever you add a custom attribute.
When a creation expression assigns a value to an attribute, the value overrides the attribute’s initial state value for all particles whose age is 0.
Example of assigning to a dynamic per particle attribute
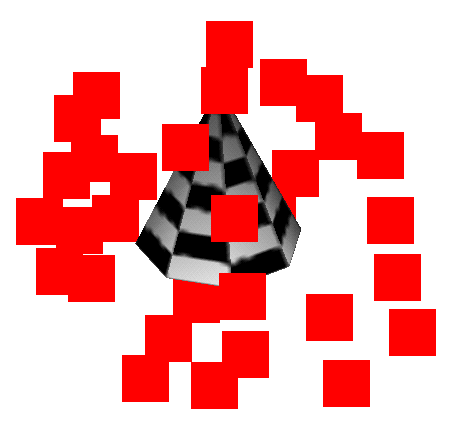
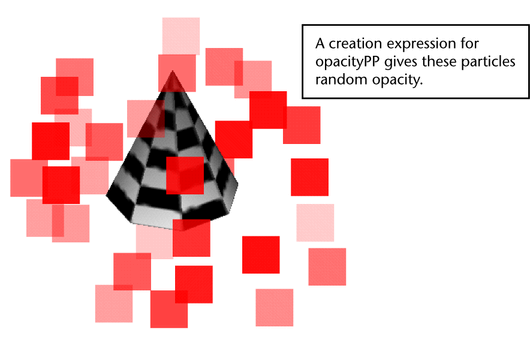
Suppose you’ve used the Particle tool to create a small number of red particles surrounding a checkerboard cone. The particle object is named Squares. It is displayed in the Points render type with a large point size, so the particles look like large opaque squares.

The following steps show how to assign values to opacityPP so that each particle has a different random opacity.
To use a per particle opacityPP attribute:
A window appears that prompts you to choose whether to add the attribute per object or per particle.
This adds an opacityPP attribute to the particle shape node of Squares. You can set the value of opacityPP to give each particle a different opacity.
SquaresShape.opacityPP = rand(1);
print("Hello\n");
Because opacityPP is a per particle attribute and the object’s particle shape node is selected in the Expression Editor, the expression does an execution loop of both statements once for each particle in the object.
Because the expression is a creation expression, it executes after the expression compiles. It also executes when you rewind the animation after playing it.
For each of the particles, the first statement assigns the opacityPP attribute a random floating point number between 0 and 1. The rand function returns a different random number each time it executes, so each particle has a different opacityPP value between 0 and 1. Each particle therefore has a different opacity at birth. For details on the rand function, see Useful functions. The second statement displays Hello in the Script Editor, once for each particle.
When you play the animation, the creation expression does not execute. The particles therefore retain the opacity they received upon rewinding.

Every time you play then rewind the animation, each particle receives a new random opacity. The creation expression executes the random function each time you rewind.
If you were to use the preceding expression as a runtime expression rather than creation expression, the opacity of each particle would change each frame as the animation plays. In each frame, the runtime expression would execute, assigning a different random value between 0 and 1 to the opacityPP of each particle.
Example of assigning to a dynamic per object attribute
Suppose you’ve used the Particle tool to create a new particle object named Squares that’s similar to the one described at the beginning of the previous example. The following steps show how to give all particles in Squares a single opacity that changes from transparent to opaque in five seconds animation time.
To use a per object opacity attribute:
A window appears that prompts you to choose whether to add the attribute per object or per particle.
This adds the opacity attribute to the particle shape node for Squares.
SquaresShape.opacity = linstep(0,5,age);
The runtime expression executes each frame during playback. The statement in the expression executes once for each particle and assigns the opacity attribute an identical value between 0 and 1 according to the linstep function (see linstep for details). The values rise gradually from 0 to 1 for the first five seconds of the object’s existence.
