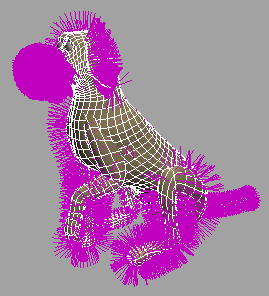
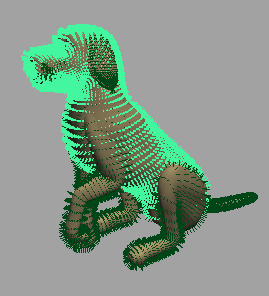
Add body fur
As a starting point, you can add fur to your model and set global fur attributes so that the fur is even and grows in approximately
the desired direction. See To add body fur.
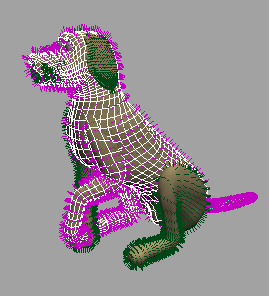
After adding fur and setting global fur attributes, you can use Maya Artisan to paint most fur attributes locally. See the
following:
To add body fur
- Select all surfaces you want to have fur.
- Attach fur to the surfaces (Fur > Attach Fur Description > ).
- Select the fur feedback (click a feedback hair) and in the section of the , change the name of the fur description from FurDescription1 to something meaningful (for example, bodyFur).
- Change the length of the fur, if necessary.
- If the fur appears to be growing inwards (or appears bald) on some surfaces, reverse the fur normals on these surfaces:
- Select the fur feedback or the surfaces where fur appears to grow inward (or appears bald).
- Reverse fur normals (Fur > Reverse Fur Normals).
- To get more feedback on surfaces (for example, on large surfaces), increase the number of sample hairs:
- Select the fur feedback on the surface where you want more feedback.
- In the section of the , set the and to a higher value.
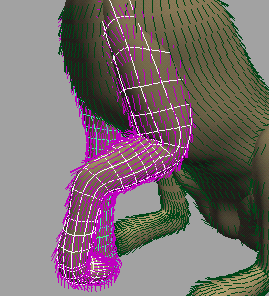
- Make the fur lie flatter to the skin of the animal by increasing the Inclination value.
- If the fur grows in a different direction on some surfaces, offset the polar direction for these surfaces.
- Set the fur color by doing one of the following:
- For more natural looking fur, add some to the fur.
To make the nose bald
- Select the surfaces that make up the nose.
- Select Fur > Paint Fur Attributes Tool >
 .
.
- In the window, select from the drop-down list.
- In the editor, set the to 0.
- Dolly in on the nose and carefully paint away the hairs.
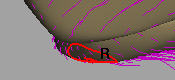
To change the fur length around the muzzle
- Select the body surface.
- Select Fur > Paint Fur Attributes Tool> .
- In the window, select from the drop-down list.
- In the editor, set the to be less than 1 (how much less depends on how short you want the fur).
- Paint around the muzzle to shorten the fur.
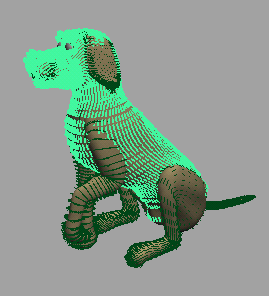
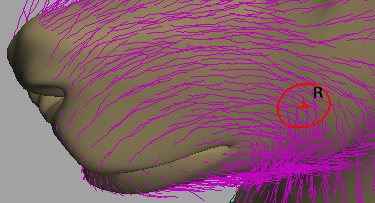
To comb the fur
- Select the fur feedback or the surface with fur you want to comb.
- Select Fur > Paint Fur Attributes Tool > .
- In the window, select from the drop-down list.
- Brush along the fur. The fur is combed in the direction of your brush stroke.
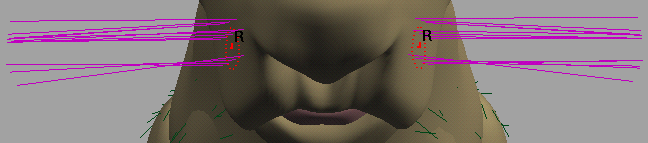
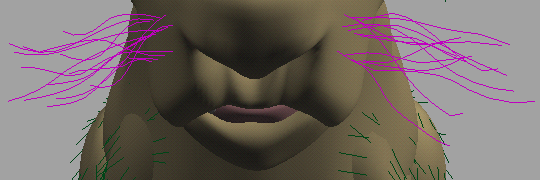
Add whiskers
Use this technique to add whiskers to your models.
To add whiskers
- Select the surface you want to put whiskers on.
- Select Fur > Attach Fur Description > .
- Select the fur feedback and change the name from FurDescription1 to something meaningful (for example, whiskers) in the section of the .
- Reduce the number of whiskers:
- Select the surface you want to put whiskers on (not the feedback).
- Select Fur > Paint Fur Attributes Tool> .
- In the window, select from the drop-down list.
- In the editor, set the to , the to 0, and click the button. All the fur disappears.
- Set the back to 1.
- In the section, turn on (normally it would be X).
- Paint whiskers back onto the muzzle.
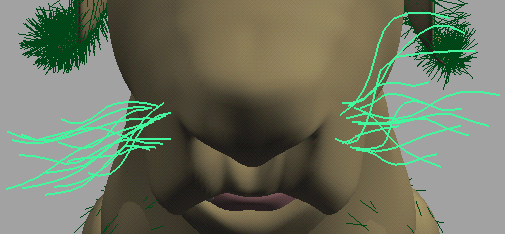
- Make the new fur description look more like whiskers:
- Select the whiskers feedback and in the , set the to 1.
- Select Fur > Edit Fur Description > to open the .
- Set the value to 0.8, the value to 0.9, and the value to 0.
- Set the value to 0.3 and the value to 2.0.
- Set the value to 0.75.
- Go to the section.
- Go to the section and set the value to 0.5.
- Go to the section and set the value to 0.2.
- The value makes whiskers grow downwards on one side and upwards on the other because of the UV direction of the surface. To fix
this:
- Select the surface the whiskers are attached to.
- Select Fur > Paint Fur Attributes Tool > .
- In the window, select from the drop-down list.
- In the editor, set the to and the to 0.25.
- In the section, turn off .
- Paint the side of the muzzle where the whiskers are growing upwards.
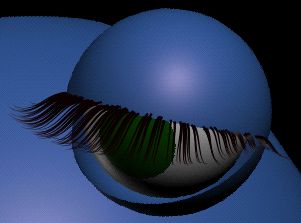
Add eyelashes
Use this technique to put eyelashes on an eyelid.
To add eyelashes
- Select the surface you want to put eyelashes on.
- Select Fur > Attach Fur Description > .
- Select the fur feedback and change the name from FurDescription1 to something meaningful (for example, eyelashes) in the section of the .
- Set the number of and on the surface high so you can paint hairs more precisely.
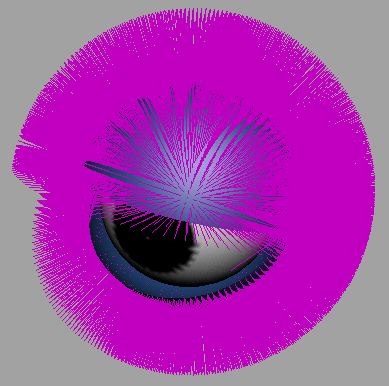
- Reduce the number of eyelash hairs:
- Select the surface you want to put eyelashes on.
- Select Fur > Paint Fur Attributes Tool > .
- In the window, select from the drop-down list.
- In the editor, set the to , the to 0, and click the button.
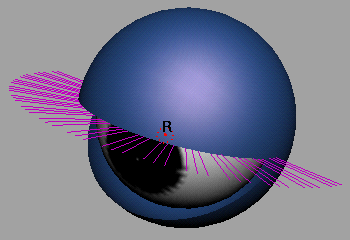
- Paint eyelashes back onto the eyelid.
- Set the back to 1 and paint eyelashes carefully along the edge.
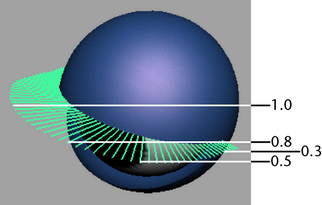
- Trim the eyelash to the shape you want it:
- Progressively paint length values, such as 0.3 at the edges, 0.5, 0.8 and then 1.0 for the longest lashes at the center.
- Set the value to 1 and to , then until the lash length looks smooth.
- Make the new fur description look more like eyelashes:
- Select the eyelashes feedback and in the , set the to 1.
- Select Fur > Edit Fur Description > to open the .
- Set the value to 0.8, the value to 0.9, and the value to 1.
- Set the value to 0.3 and the value to 2.0.
- Go to the section.
- Go to the section and set the to 1.2 and the value to 0.325.
- Go to the section and set the value to 0.0325.
- Go to the section and set the value to 0.05.
- Go to the section and set the value to 0.115.
To render the eyelashes through spectacles (refractive material)
- Render the full scene with the fur, but with the spectacle lenses hidden.
- Create an image plane using the rendered image by selecting (select the rendered image).
- In the , set the following:
- In the section, set to .
- In the section, click .
- In the section, turn on .
- In the section, set a value so that the image plane sits behind the backmost part of the lenses. If needed, you can create an expression that accurately
tracks the value.
- Hide all other objects in the scene except for the raytraced spectacle lenses and frame and the image plane.
- Turn off , and render the scene again.
The image plane containing the fur will be refracted through the lenses.