While you can change the basic layout of an asset’s attributes by editing its template file (see Edit an asset template), adding multiple views lets you set up multiple layouts for the same asset.
Some information (such as labels and descriptions) can be provided in both the template and the view. View-specific definitions take precedence over template-level definitions when they are provided.
For detailed information on the XML elements allowed within a view definition, see View elements.
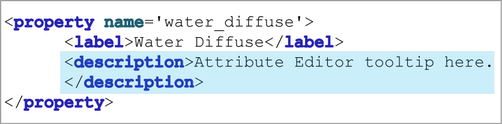
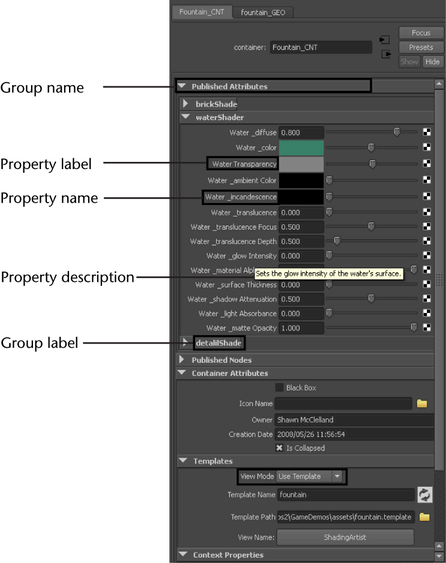
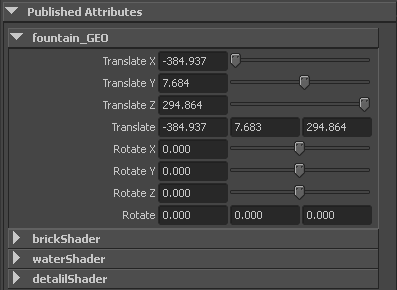
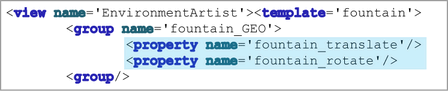
The following illustration gives you a brief overview of the view XML elements and how they display in the Attribute Editor.
To locate a view definition within a template file
By default, the asset templates you create are saved in the assets sub-directory of your current project. (See Create an asset template.)
For example, to find a view that you named “ShadingArtist”, search for the view name “ShadingArtist”. (See Add a view to an asset template for information on adding views to your template files.)
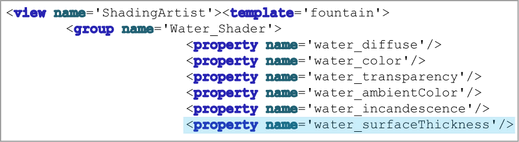
The view definition is located between <view> element tags. See Parts of an asset template to see a diagram of a template file.
You can edit the elements within this view definition to change the way the view displays.
To remove attributes from a view
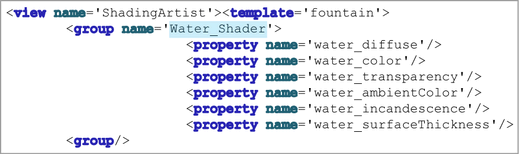
By default, all attributes from the template are added to the view when you create it. The attributes are represented in the view definition by <property> elements. The <property> elements refer to the attributes available in the template by name.
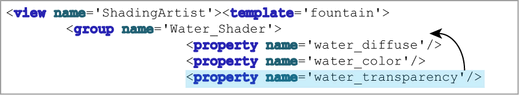
You can edit the view definition to remove any attributes you don’t want to display in a particular view.
When you reload the template in Maya and select the modified view as active, the attributes corresponding to your deleted <property> elements no longer display in windows and editors.
To change the display names of attributes in a view
In each view, you can use <label> elements inside each property definition to change the name that displays for the corresponding attribute in the Attribute Editor.

To re-order or re-group attributes in a view
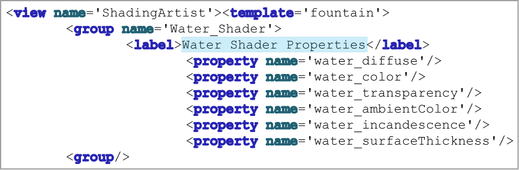
To change the heading for a group of attributes in a view
Before proceeding with these steps, ensure that you select the Group By Node layout in the Add View Options as you create the view.
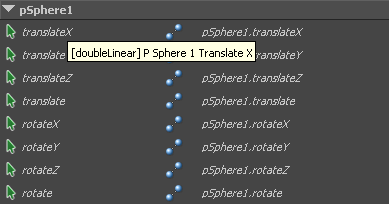
To display child attributes with individual controls in a view
When Expand Compounds is on, the child attributes of compounds are added to the view definition individually.
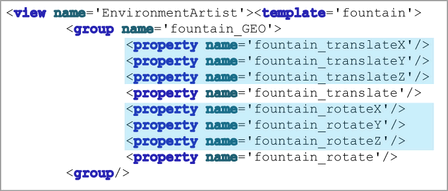
Consequently, they display with individual controls.
To display only group controls for compound attributes in a view
When Expand Compounds is off, child attributes are not individually listed in the view definition, so the parent attribute (with its children) will be displayed using a group control.
To change tooltips that display in the Attribute Editor
You can set up each view to display different tooltips as the users of your asset mouse over attributes in the Attribute Editor. This lets you display any information that will be helpful to your users.