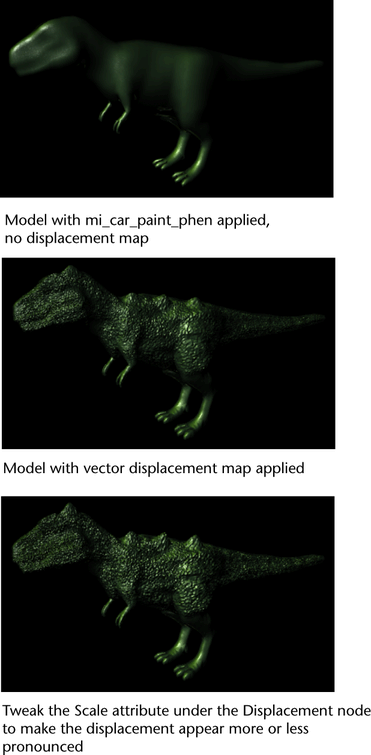
Use this feature to create surface relief by connecting your vector displacement map to your shading group in Maya. You can
create your vector displacement map in Mudbox or any comparable software. Your vector displacement map must be in 32-bit float
.exr or .tif file format.
You can use this feature with any Maya or mental ray shader; however, the final render must be performed using mental ray
for Maya.
General guidelines for using Mudbox to create your vector displacement map
- Create a primitive and increase its subdivision level (). Sculpt your model as necessary.
- Select your model, then select and select .
- Select 32-bit float .exr or .tif as your target file format.
- Select your vector space under .
NoteUse of and are not recommended. Vector displacement maps should be used in or space, and not on deforming objects, when working between Mudbox and Maya.
- Select if necessary.
- Select .
Your model is imported into Maya.
Connecting your vector displacement map to your shading group in Maya
- Ensure that you have the following plug-ins loaded: Mayatomr.mll, tiffFloatReader.mll, OpenEXRLoader.mll.
- Select and select and create a shader.
- Click the Map button beside in the shader
- Select from the window that appears.
- In the node , click the browse button and navigate to the file that contains your vector displacement map.
- Select your shading group node to display its , and connect your shader to the attribute.
- Render using the mental ray for Maya renderer.
NoteYou should select the same vector space in both Mudbox and Maya. In Mudbox, select the in the options window. In Maya, select the in the node .
TipWhen rendering with mental ray for Maya, you can improve your render results by selecting your model's shape node, then in
its , under , select . Under , de-select , and set the to 2 (or higher, if necessary). You can also adjust your (to 10, 10, 10, for example) under for better results.