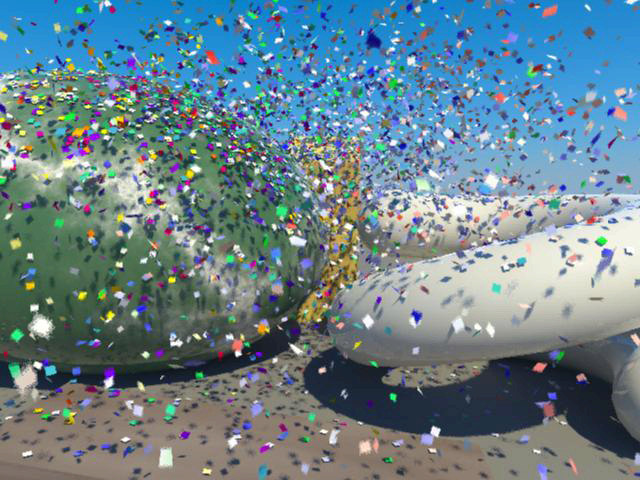
This example will show you how to create realistic looking nCloth confetti that collides with objects and forces in its scene
as well as itself.
Create Confetti
To create the confetti
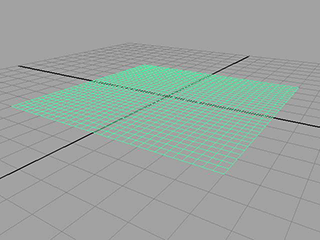
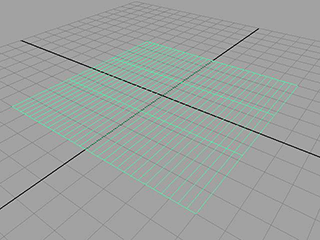
- Select Create > Polygon Primitives > >
 .
.
The window opens.
- Select .
- Set the plane options as follows:
- Click .
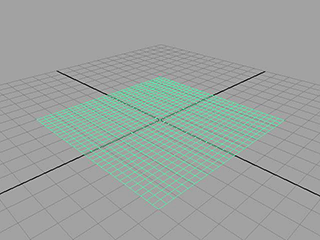
Maya creates a plane centered at the origin.
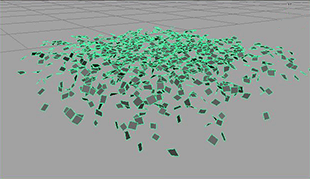
- In the menu set, select Edit Mesh > Detach Component.
The plane will become separated such that each face becomes a new plane.
- Select all the planes.
- In the menu set, select nMesh > Create nCloth.
- In the , change the name of the nCloth to “Confetti.”
- In the section, turn off.
- In the section, adjust the settings as follows:
- Playback the nCloth simulation.
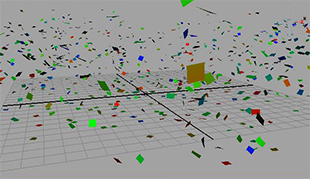
The cloth falls uniformly. To change this, you need to add turbulence.
Enhance the way the confetti falls
To add turbulence to the nCloth
- Go to the beginning of the playback range.
- Select the Confetti plane.
- In the menu set select Fields > Turbulence > .
The window appears.
- Set the as follows:
- Click .
- Set the End Time of the playback range to 100.
- Playback the simulation.
The simulation plays back more realistically, but also very slowly.
To improve the speed of the simulation
- Select the Confetti nCloth and open the .
- In the nucleus1 tab set the attribute to 0.1.
Maya has been treating the nCloth as a 10x10 meters object according the default dynamics settings. By setting the space scale
to 0.1 the plane is now 1 meter square in terms of dynamics. This makes it simulate much faster.
You should now add the ground plane and some color.
To add a ground plane to the simulation
- Select the Confetti nCloth.
- In the , set to 30.
- In the , select the nucleus1 tab.
- In the section , activate .
Color the confetti
To add color to the confetti
-
 -click the nCloth and select from the pop-up menu that appears.
The window appears.
- In the right panel of the window, click
 .
.
- In the , select the rampShader1 tab.
- In the section, select the checkered box next to .
The window appears.
- Select .
- Change to Shaded and Textured mode (hotkey: 6).
- Playback the simulation.
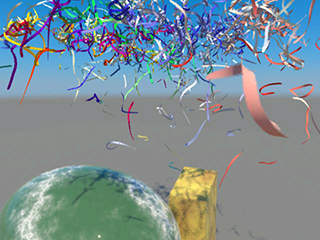
The confetti now glitters and falls as real confetti would. Now that you have a base simulation for your effect, you can perform
a number of optional steps to enhance the simulation.
Customize the shape of confetti (optional)
You can create circular confetti using a very similar procedure.
To create circular confetti
- -click the nCloth and select .
The opens with the rampShader1 tab selected.
- In the section, select the checkered box next to .
The window appears.
- In the right panel of the window, click
 .
.
- In the , under set to .
- In the editor, click the box with an x at the center of the color ramp to eliminate the green marker.
- Select the small red circle at the bottom left of the color ramp. The colored box next to should change.
- Click the colored box next to .
The that appears.
- Select the color black and move your mouse off the to close it.
- Under , set to 0.45.
- Select the small blue circle at the top left of the color ramp.
The colored box next to should change.
- Click the colored box next to
The appears.
- Select the color white and move your mouse off the to close it.
- Under , set to 0.5.
- In the place2dTexture1 tab, under set to 30, 30.
Now when you render the simulation the confetti appears as circles instead of squares.
Note
The confetti appears as circles only when rendered. The confetti appears as squares in the scene view. You may need to change
to Wireframe mode (hotkey: 4) to see the confetti.
nCloth Streamers
You can use this procedure to generate streamers as well.
To create streamers
- Select File > New Scene.
- Select Create > Polygon Primitives > > .
The window appears.
- Select .
- Set the plane options as follows:
- Click
Maya creates a plane centered at the origin.
- In the menu set, select Edit Mesh > Detach Component.
The plane separates such that each face becomes a piece of confetti.
- Select the plane and select Edit Mesh > Add Divisions.
Maya adds a number of divisions to the plane. These are used to allow the streamers to swirl and bend.
- In the , select the polySubdFace1 tab.
- Set the following attributes:
- In the menu set select nMesh > Create nCloth.
- In the , change the nCloth’s name to “Streamers” and adjust the nCloth’s attribute values as follows:
- :
- : 0.2
- : 0.5
- : 2
- : 2
- : 0
At this point you can add turbulence, color, and a ground plane exactly as you did for the confetti.