The user can employ the Position Constraint to make a source object move to and be coincident with another object, called the target object. Position Constraint,which constrains the position of an object to a target, is similar to instancing the position controller of one object and pasting it on another. Rotation and scaling is completely free. Once engaged, the source object becomes constrained to the target object's position. Animating the target object's position causes the source (constrained) object to follow.
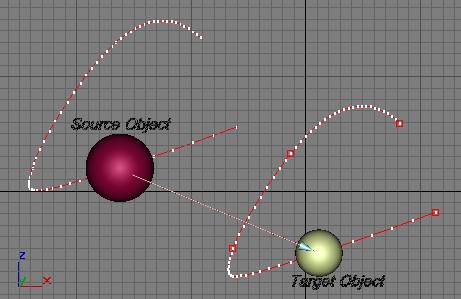
In the figure below the red sphere is the source object and it is position constrained to the yellow sphere, which is the target object. The constraint is under the special option called 'Keep Initial Offset', such that the source object doesn't jump to the target object when assigned but preserves its current position. Essentially the source object appears to be connected by a rigid rod to the target object. If the target object's position is animated through different frames, the source object faithfully follows the target on an identical trajectory - the trajectories are shown below with red lines.
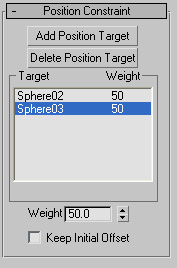
The Position Constraint can also move an object to the position of the weighted-average of several different targets. Each target has a weight value defining its influence. A value of 0 is equal to "off". Any value greater than 0 will cause the target to influence the constrained object. Weight values may be animated to create effects such as a ball being picked up from a table. Note that the weights are pure numbers (which are normalized "under the hood" before being applied) and not percentages.
Procedure to engage the position constraint:
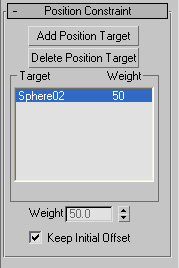
The user interface of the Position Constraint in 3ds max is shown below. The various options of the constraint can be accessed through the motion panel - see the UI snapshot below. A familiarity with the UI will be necessary when we discuss how this is handled by the code.
The UI works as follows. The user selects an object and assigns Position Constraint. Next, in the Position Constraint UI menu the following functions can be performed: