Show in Contents

Add to Favorites

Home: Autodesk Mudbox Online Help

Prepare a model for painting

Painting

Paint file formats

Painting basics
Before
you begin painting on a model, consider the type of color map you
want to paint (diffuse/color, bump, gloss, reflection), the resolution/size
of the image you want to produce, and finally the bit depth for
the image.
The paint criteria are,
in general, dependent on your rendering software, or your company’s
production workflow requirements.
- Load a model into the 3D
View.
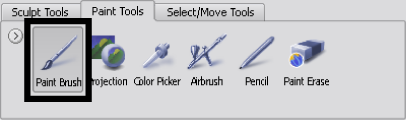
- In the tool trays, select the Paint tab,
and select the Paint Brush.
- Stroke on the mesh to paint.
The Create New Paint Layer window
appears.
NoteThe first time you
paint on a model, the Create New Paint Layer window appears.
You must have at least one paint layer in order to paint on a model.
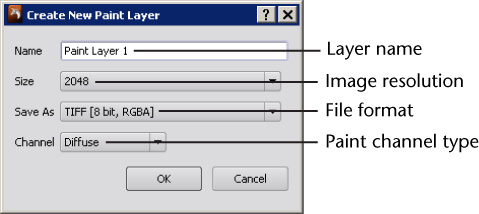
- In the Create New Paint Layer window,
do the following, then click OK:
- Name: Type
a name for the layer.
- Size: Select
the size (resolution) for the image by selecting a number that represents the
number of pixels along X and Y for the image (square aspect ratio
- 256, 512, 1024, 2048 (default), 4096). The larger the image, the
finer and sharper the detail you can apply when painting.
- Save As:
Specify the image file format and bit depth (8, 16, 32) for the
image you are going to paint. For a list of supported image formats,
see
Paint file formats.
The higher the bit depth, the smoother the blending of colors in
the image. Higher bit depth images can sustain color and contrast
adjustments with less degradation in quality compared to low bit
depth images.
- Channel: Specifies on which
paint channel to apply the paint and how it appears on the model
as a result. For example, if you want the paint to appear as the
diffuse base color material for the model, select Diffuse (default).
If you want to produce a texture that appears more tactile, for
example, one that renders in relief or appears like it is embossed,
select Bump Value.
- Stroke on the mesh in the area you want
to apply paint. The default paint color is white.
NoteThe default color for the Paint
Brush tool is white so that when a stamp image is loaded
onto a brush, the original color of the stamp image is maintained. Keep
this in mind if you change the brush color and use a stamp. You
can tint the color of the image when using a stamp by modifying
the Color property for the Paint Brush tool.
How the paint appears
on the model is dependent on how you set the Channel setting for
the paint layer.
- To undo your previous paint stroke, select Edit
> Undo (hotkey: Ctrl + Z).
- To erase paint on the current paint layer,
click the Paint Erase tool on the Paint
Tools tray and stroke across the area you want to erase.
- To save your paint work, select File
> Save.
When you save your model,
any paint layers you created are saved in the same location as your
.mud file in a subdirectory with the same name as your .mud file
with a -files extension (filename-files).
By default, two images are saved for each layer: a background image
that represents the material background color, and an image containing
the information you painted.
To save individual paint
layers, see
Export a paint layer.