Sculpting in Mudbox is
as easy as loading a model, subdividing it, and selecting a sculpt tool
from the Sculpt Tools tray using the
following steps:
Load
a model into the 3D View if youhaven’t already,
then click the Sculpt Tools tab to display
the Sculpt Tools tray.
In the Sculpt Tools tray,
select a sculpt tool.
In the 3D View,
position the cursor on the model and press the left button and drag
the cursor across the surface of the model.
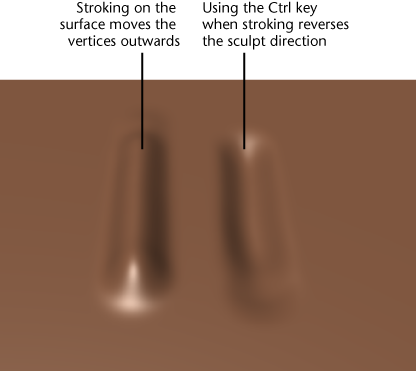
The vertices on the model
move slightly outwards in the regions affected by your sculpt stroke.
NoteAll sculpt tools
do not move the vertices outwards by default.
To reverse the sculpt direction for any
sculpt tool, press the Ctrl key, and drag the cursor across the
surface of the model while pressing the left button.
NoteWhen you click a
tool icon in any tray, the tool properties display in the Properties window
located on the right side of the user interface. You can change
a sculpt tool’s properties (for example, Size and Strength)
in the Properties window, or by using
hotkeys.
NoteYou can quickly modify
a sculpt tool’s falloff value by selecting a falloff preset from
the Falloff tray. For more information,
see
Sculpt Tool properties.