You
can slip the frames used in one shot without adjusting the shot's
position in the timeline. You may need to slip your shot to synchronize
action in the picture to the audio or because unwanted frames are
appearing at either the head or tail.
To slip one or more shots:
- Select the shot you want to slip in the
Storyboard. The selected shot's border turns red. To select multiple
shots on the Storyboard, right-click each shot. The borders turn
aqua.
NoteYou must have available
handles to slip a shot.
- Click Editing in the main menu, and then
click Edit.
The Edit menu appears.
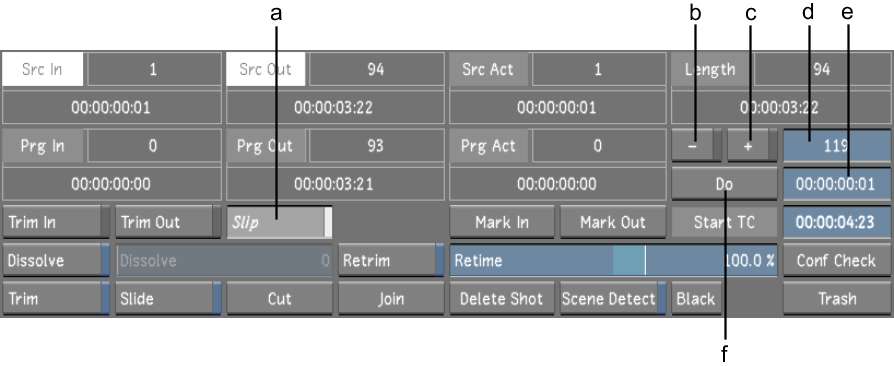
- Click Slip to go into Slip mode.
Src In and Src Out are
highlighted.
- Slip forward or backward:
- Click + to slip forward.
- Click - to slip backward.
- Do one of the following:
- Click the Do field, then click the frame
field and enter the number of frames you want to offset the shot
by. The frame number is converted into the corresponding timecode
value.
- Click the Do field and enter the timecode
for the number of frames to offset the shot by. The timecode is
converted into the corresponding frame number.
NoteCtrl-click the field to clear it.
- Click Do.
The shot or shots are
offset by the specified number of frames. The Src In and Src Out
fields are updated to display the frames used.