There are options for customizing the view on both the Navigation panel and the Function panel.
When working with secondaries, users can use the Function panel to view them in Saturated Mask view or Matte view. Saturated Mask view displays the range of colours you define through a greyscale image. The unselected colours remain grey. Matte view displays a black and white template indicating which parts of the image are transparent (black), and which are opaque and selected (white).
To access view options available on the Navigation panel:


The View, Panel, Storyboard, Label, Thumbs, and GUI options appear in the digital display at the top of the panel. The location of each option in the digital display reflects their button position on the panel.
| Press: | To: |
|---|---|
| GRADE | Select the viewing options. Player Viewing Options. |
| CURVES | Adjust the panel sensitivity. See Customizing the Panel Sensitivity. |
| KEY | Toggle the Storyboard on or off. |
| GEOM | Toggle the shot name on or off the image. |
| P&S | Toggle the Storyboard thumbnails on or off. |
| MISC | Toggle the full-screen Player on or off. |
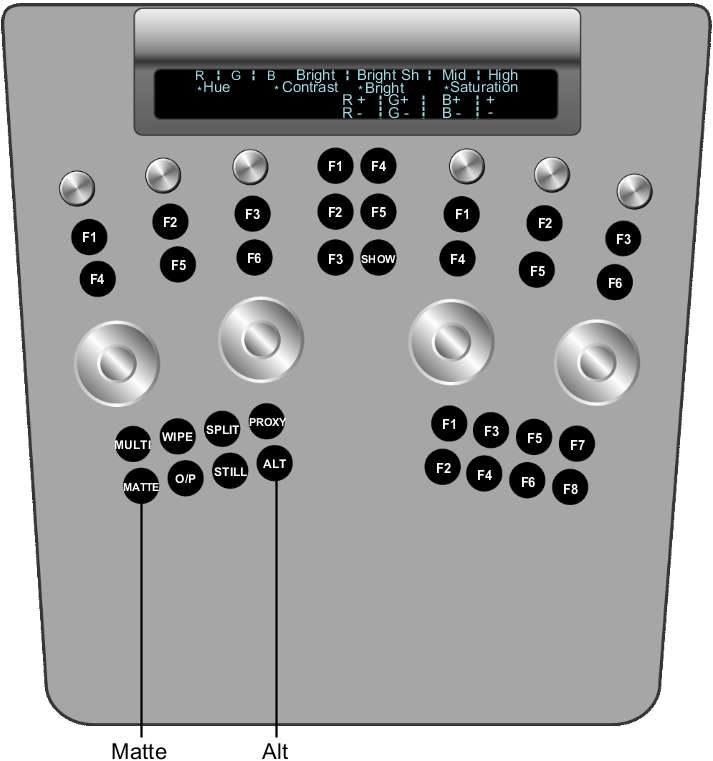
To access view options available on the Function panel:

| Viewport option | Description |
|---|---|
| MULTI | Cycles through the Multi view modes. You can view 2, 4, 9, or 16 shots within the Player. |
| WIPE | Cycles through the horizontal wipe, vertical wipe, and blend (for a stereoscopic project only). |
| SPLIT | Toggles between the current view options and the Single view (default). |
| PROXY | Toggles between the full-resolution and half-resolution (proxy) version of your shot in the Player. If you have not rendered a proxy, an X appears in the Player. |
| MATTE | Toggles between secondary grading view and result view. |
| O/P | Toggles between a rendered version of your shot (P) and the pre-rendered version with grading applied (O). If you have not rendered the shot, an X appears in the Player when in P mode. Press the ALT and O/P buttons simultaneously to toggle to I mode (this displays the image with colour corrections made in the Grading and Curves menus only). |
| STILL | Displays the stored reference image. Press the ALT and Still buttons simultaneously to store the current frame in the reference buffer. |
To change fonts in the digital display:
To toggle between “O” view and Matte view: