The Dissolve editor has a new user interface and new options.


The following is a list of all options available in the Dissolve editor:
Dissolve button Enable the dissolve located at the current transition.
Duration field Set the length of the dissolve. The default value is the defined in the User settings. See Dissolve Options.
Orientation box Define the orientation of the dissolve.
| Select: | To: |
|---|---|
| Centred | Place the dissolve in the middle of the transition. |
| From Cut | Start the dissolve at the cut point. |
| Up To Cut | End the dissolve at the cut point. |
Curve Type box Select the type of dissolve curve.
| Select: | To: |
|---|---|
| Blend | Use the In/Out options to blend between the outgoing and incoming shots. |
| Dissolve | Produce a dissolve similar to that found in Smoke and Flame. Importing a timeline with dissolves from Wiretap server 2011 Extension 1 will include dissolve curves. |
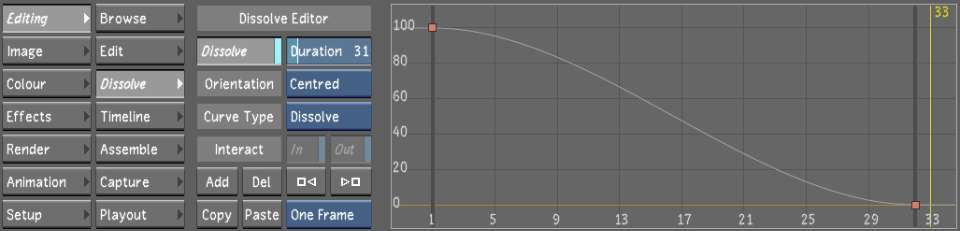
The Dissolve curve allows you to animate your dissolve. Use the controls located on the left side of the Dissolve editor to add, delete, copy, paste and navigate between keyframes. Using the Dissolve editor, navigate the timeline to edit any transition from within the editor. Use the navigation buttons, the hotkeys or the Autodesk Control Surface to navigate the Timeline.
Right-click to zoom the Dissolve editor and middle-click to pan. To reset the Dissolve editor, press the Home key on the keyboard.
On the right side of the Dissolve editor, you will find the Animation Controls and the Animation options. See Animation Editor.


