When Log is enabled in the Setup Grade menu, the Colour Grading panel and the Function panel are activated with logarithmic colour grading functionality.
Grading in Logarithmic Mode Using the Colour Grading Panel
Use the Colour Grading panel to:
There are two available setups for the Colour Grading panel. You can switch between setups by pressing the F9 button.
The default setup allows you to modify contrast, overall brightness, and brightness in the shadows, midtones, and highlights. Adjusting brightness in the shadows, midtones, and highlights requires that you switch the functionality of the first trackball among the three. You use the second and third trackballs to adjust contrast and brightness in the overall image.
The alternate setup distributes brightness controls for the shadows, midtones, and highlights amongst the three trackballs. This allows you to balance the values without having to constantly switch the functionality of a single trackball.
To colour grade using the Colour Grading panel default setup:


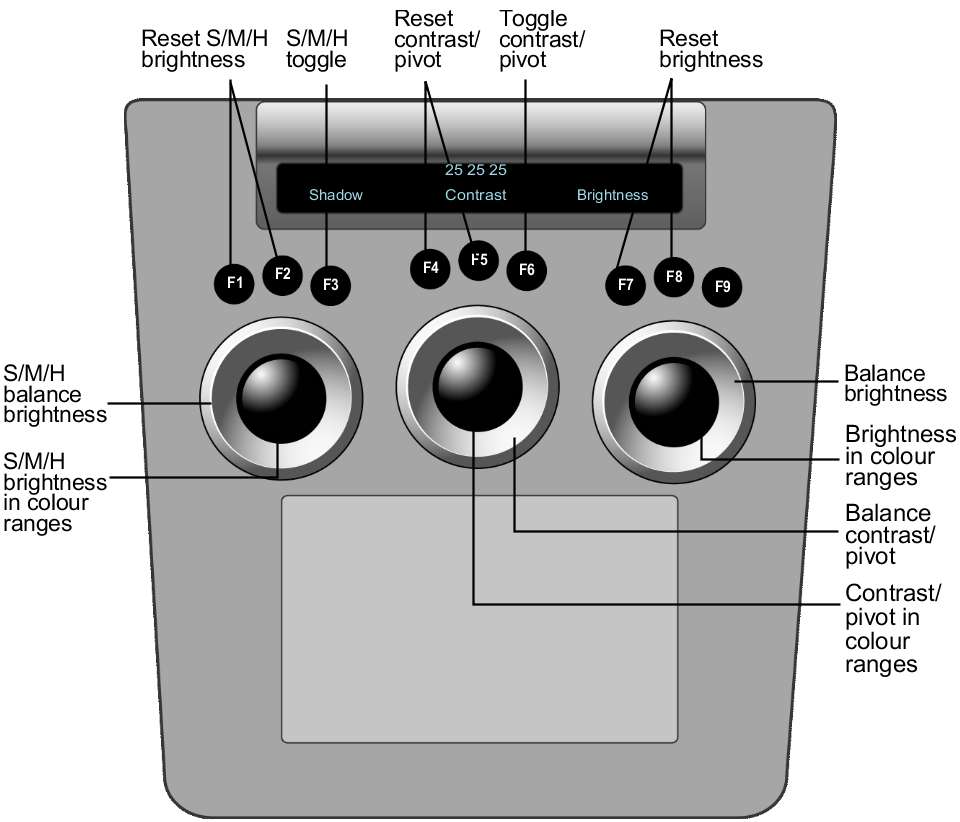
| Use: | To: |
|---|---|
| First ring | Adjust brightness in the shadows, midtones, or highlights for the overall image. To reset, press F1. |
| First jog ball | Adjust brightness in the shadows, midtones, or highlights for a range of colours. To reset, press F2. |
| F3 button | Switch functionality for the first trackball between shadows, midtones, or highlights. |
| Second ring | Adjust contrast/pivot in the overall image. To reset, press F4. |
| Second jog ball | Adjust contrast/pivot in a range of colours. To reset, press F5. |
| F6 button | Toggle functionality for the second trackball between contrast and pivot. |
| Third ring | Adjust brightness in the overall image. To reset, press F7. |
| Third jog ball | Adjust brightness in a range of colours. To reset, press F8. |
To colour grade using the Colour Grading panel alternate setup:

| Use: | To: |
|---|---|
| First ring | Adjust overall brightness in the shadows. To reset, press F1. |
| First jog ball | Adjust brightness in the shadows for a range of colours. To reset, press F2. |
| Second ring | Adjust overall brightness in the midtones. To reset, press F4. |
| Second jog ball | Adjust brightness in the midtones for a range of colours. To reset, press F5. |
| Third ring | Adjust overall brightness in the highlights. To reset, press F7. |
| Third jog ball | Adjust brightness in the highlights for a range of colours. To reset, press F8. |
| F9 button | Toggle between the panel default and alternate setup. |
Grading in Logarithmic Mode Using the Function Panel
When the Grade menu is enabled, you can use the Function panel to:
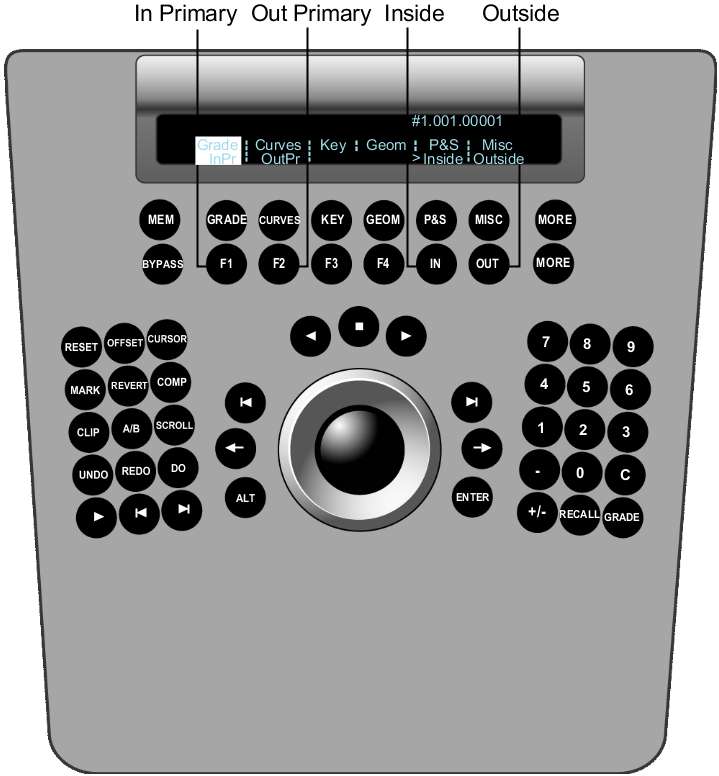
To colour grade in Logarithmic mode using the Function panel:
The In Primary, Out Primary, Inside, and Outside options are activated.