When sliding a selected splice or transition in the timeline, the slide operation works on that splice or transition only. It does not affect the splices and transitions at either end of the segment.
To slide a splice or transition using the Slide cursor:
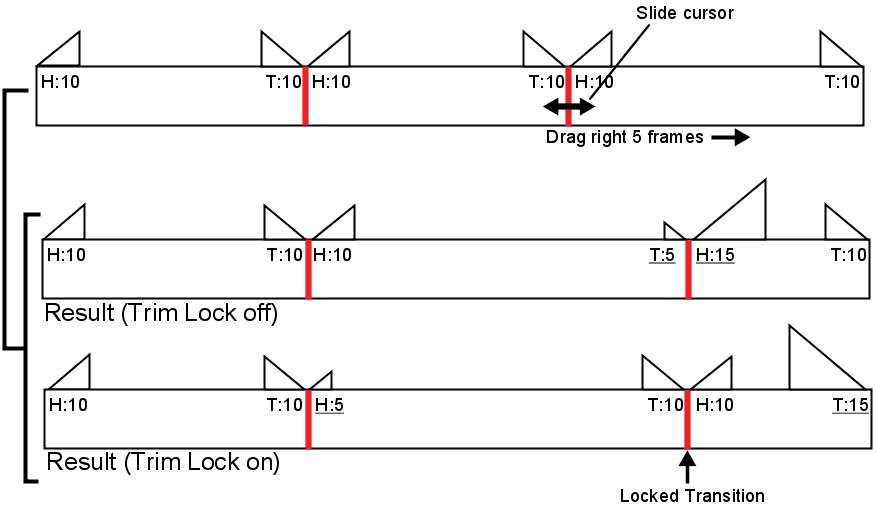
The results of dragging right, which vary according to how Trim Lock is set, are shown in the following illustration. In the illustration, a splice is slid five frames to the right when Trim Lock is on and off. Underlined numbers indicate trimmed heads and tails. Dragging left produces similar (but inverse) results.


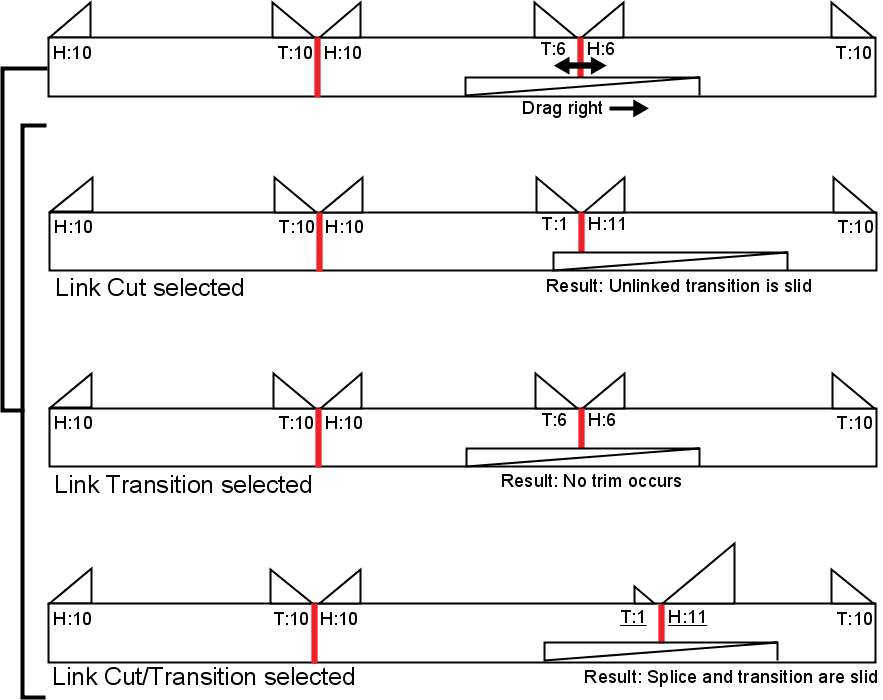
The following illustration shows the effect of sliding a dissolve five frames to the right. In this example, assume that both Ripple and Trim Lock are off. Use the results as a guide when trying other combinations.
You can slide audio segments in the timeline on a subframe basis by holding down the spacebar while sliding.
If you select a video segment with a group of audio subframes, you cannot slide on a subframe basis.


