


Creating a Motion Path
With motion path animation, object positions follow a spline (curved line) that you create in the image window. By creating a motion path, you have a visual reference for the object's position. Use motion paths to animate the position of any of the following:
The following procedure illustrates how to create a motion path for a 3D object (an apple) over a a 30-frame clip in Action. The 3D object follows a motion path spline that is drawn from the upper-left corner at frame 1 to the lower-right corner at frame 30.
To animate a 3D object in Action:


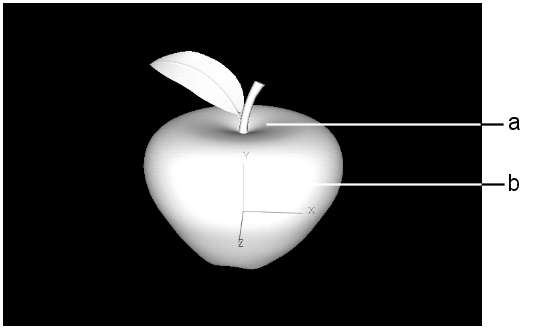
(a) The object (b) The object's axis

(a) Motion path
Once you set the second vertex, the default speed curve is created in the Channel Editor. The keyframes in the speed curve match the vertices in the motion path.
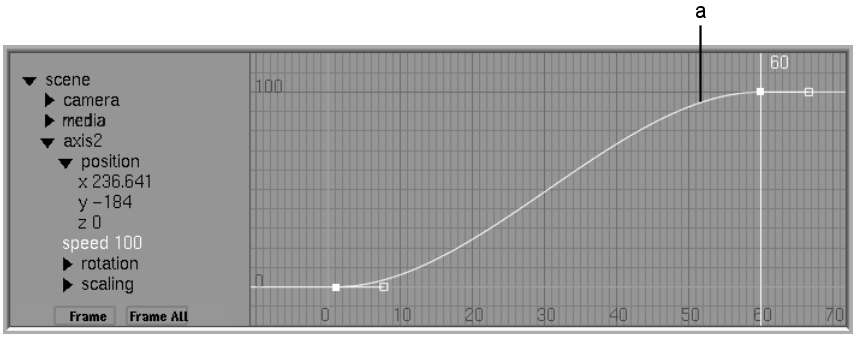
(a) Speed curve
The spline represents the path of the object, camera, or light source, for example, and consists of alternating colour segments. Each segment represents one frame and indicates the object's speed: the longer the segment, the faster the object is travelling. When the motion path is selected, the segments of the spline are red and blue. When unselected, the segments are blue and green.
The spline is drawn using vertices. Each vertex has a tangent handle that changes the shape of the spline. Changing the shape of the spline between vertices also affects the speed of the animation.
The speed curve represents the percentage of the path travelled by the animation in time. In other words, the keyframes on the speed curve correspond to the timing values for the keyframes.
The speed curve is created automatically when you draw the motion path. The speed curve controls the timing of the animation. When you create the motion path, a keyframe is added to the speed curve for each vertex on the spline. You can edit the speed curve and adjust the timing of the animation by moving, adding, and deleting vertices from the spline or keyframes in the speed curve. Modifying keyframes on the speed curve does not affect the shape of the motion path spline.