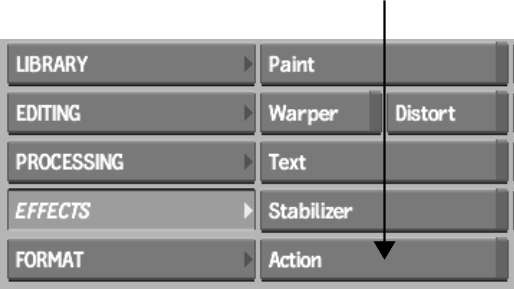
When you access the Action module, you load the front and matte clip for the first media and the back clip used for the background. You load these clips in the order front, back, then matte.


| Select: | To: |
|---|---|
| Front Back Matte | Select source clips from the Desktop. The clips are selected in the order front, back, and then matte. |
| MultiTrack | Select a multitrack clip. The first frame of the first segment is used to fill the beginning, and the last frame of the last segment is used to fill the end. See Loading from a Multitrack Clip. |
| MultiTrack Fill Gap | Select a multitrack clip. Each gap is filled with black frames. See Loading from a Multitrack Clip. |
| MultiTrack SelfKey | Select a multitrack clip. The last track is loaded into the background and the other tracks are loaded as fronts. The mattes are created based on each front. Gaps are filled with the last frame from the preceding segment. See Loading from a Multitrack Clip with Selfkey or Self Gaps. |
| MultiTrack Self Gap | Select a multitrack clip with gaps. Each gap is filled with the last frame from the preceding segment. Mattes are created based on each front. See Loading from a Multitrack Clip with Selfkey or Self Gaps. |
| None | Enter Action with no media or back clip. From the Resolution
menu that appears, choose a resolution, width, height, pixel aspect
ratio, bit depth, scan mode, and frame depth. If Action already
contains a setup, entering with the None option keeps the objects
present in the scene and creates empty media placeholders in the
Media list for each object. Press the Alt key when you click the Action button to automatically select the None option. Press Alt when you select your destination to open Action with all media and nodes deleted and all parameters (except for resolution) set to default. |
| Clear All | To reset all parameters (except for resolution), delete
all nodes and media, and prompt you to select front, back, and matte
clips. Press the Ctrl+Alt key when you click the Action button to automatically select the Clear All option. |
Although you can use differing resolutions per media, you cannot specify clips of different resolutions to act as the front and matte clip of media (except for 10-bit, 12-bit, and 12-bit unpacked clips, which are interchangeable). An error appears in the message bar if the specified clips are not able to be loaded to the same media.
If you are selecting clips and not a multitrack clip, you can press Ctrl to load multiple fronts and mattes. The Ctrl key changes the order of clips to front and matte of media 1, front and matte of media 2, and so on. The back clip and destination are selected after the last media is filled or when the Ctrl key is released.
The Action module appears and the selected clips or tracks are loaded into the appropriate media.
The composite of the front, matte, and back clips appear in the image window and their names are listed in the Media list. The Total Frames field defaults to the length of the longest clip loaded.