When editing material from one clip to another using keyboard commands, you first need to specify which clip will contain the resulting edit (the record clip) and which clip will provide the source material for the edit (the source clip). You can only specify one record clip and one source clip at any one time, and you must set the record clip before the source clip.
When editing part of a source clip into a record clip, the current time position of the source clip serves as an implicit in point. To help keep track of your edits, you can display both the source clip and the record clip in the viewports as you work.
When a record clip is selected, the Batch timeline positioner is red. When a source clip is selected, the Batch positioner is green. Otherwise, it is yellow.


A red bar appears on the clip proxy in the schematic indicating it is the record clip. The Source TL button changes to Record TL indicating that the clip currently displayed in the timeline is the record clip. The timeline appears with a red border, and the Batch timeline positioner turns red.

(a) Batch timeline positioner (b) Record timeline border (c) Record TL button
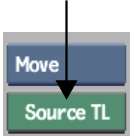
The Record TL button changes to Source TL, indicating that the clip currently displayed in the timeline is the source clip. The timeline appears with a green border, and the Batch timeline positioner turns green.
A green bar appears on the clip proxy indicating it is the source clip.

(a) Source clip (b) Record clip
To display the record and source clips in the viewports:
To navigate between the source and record clip timelines:
To change a record clip back to a source clip:
The red and green borders are removed from the clip proxies, and the timelines of both clips appear with green borders indicating they are source clips.


