You can create or modify a matte by painting directly on the matte using any brush, Special Effects media, or graphic tool. For information on using graphic and cutout tools to create mattes, see Using the Cutout Commands.


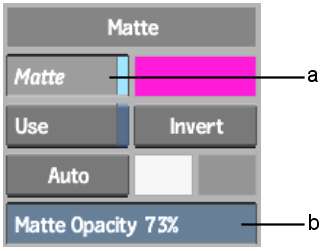
(a) Matte button (b) Matte Opacity field
The value in the Matte Opacity field determines the transparency of the paint applied to the matte. Use a value of 100 to apply fully opaque paint or objects to the matte. Reduce the Matte Opacity value to increase the transparency of the paint.
The paint and graphics are applied to the matte. If you use graphic tools, use Tack to tack the graphic to the matte. See Tacking Down Selected Objects.
The new matte clip is saved to the Desktop with the front clip.


