As you work with different nodes to create your key, it is often useful to see the effect of your changes on the image at a later part of the pipeline. You do this using context points. You set a context point on a particular node, then view that context point from the node you are working in. For example, you could place a Degrain node at the beginning of the Matte branch and set a context point on the MasterK node. You could then degrain the clip while viewing the context point, in this case, the Current Result of the Master Keyer.
You can set two context points in the pipeline.


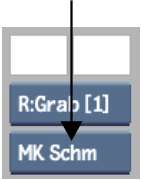
A green dotted border appears around the node and (C1) appears below the label.

(a) Context Point 1 set on GMask node
Images courtesy of Behavior Communications Inc.
When you next set a context point, the context point that was first set disappears. The (C2) context point is changed to (C1) and the new one becomes (C2). The oldest set context point is always Context Point 1, and the newest one is always Context Point 2. The oldest context point is always the one to get removed when you add a new one.
As you make changes, you see the effect the changes are having on the selected context point.


