When you create a matte for the front clip, the Keyer automatically creates a matte for the back clip to specify which part of the back clip is used for the composite. By default, the back matte is the inverse of the front matte.
You can adjust the luminance of the front matte and back matte separately in the Blending menu. For example, increase the luminance of the back matte so that more of the back clip shows through at the edges of the key. This creates a better blend at the edges of the key.
The following calculation is applied to each pixel of the image to create the composite. The calculation is applied in three passes, one each for the R, G, and B values of the front and back images, and the pixel is given the resulting R, G, and B values.
Result = F * FrontLUT + B * BackLUT
F = the R, G and B values of the front image.
B = the R, G and B values of the back image.
FrontLUT is the front matte pixel value, remapped according to any luminance curve change made in this menu. The value is expressed as a decimal, where, for example:
in 8-bit mode, 0 = 0, 127.5 = 0.5 and 255 = 1
in 12-bit mode, 0 = 0, 2047.5 = 0.5 and 4095 = 1
BackLUT is the back matte pixel value, remapped according to any luminance curve change made in this menu. The value is also expressed as a decimal.
To adjust the luminance curve:


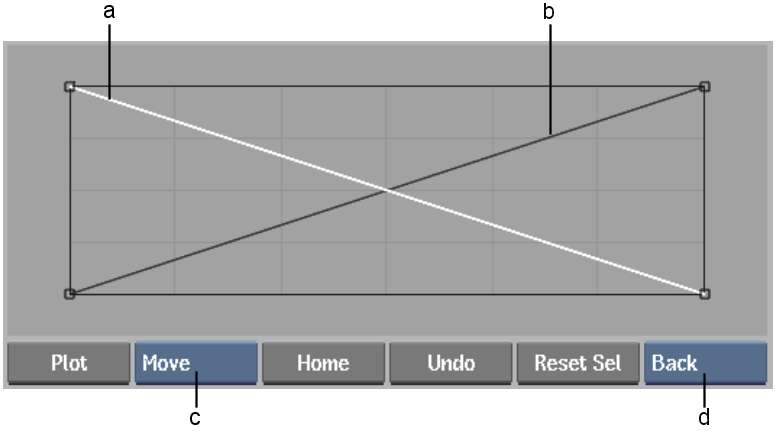
(a) Front matte curve (b) Back matte curve (c) Edit Mode box (d) Front/Back box
| Select: | To view: |
|---|---|
| Result | The composite clip. |
| Matte | The front matte. You cannot see changes made to the back matte when this view is selected. |
| Bmatte | The back matte. You cannot see changes made to the front matte when this view is selected. |
| Comp | The composite with a coloured background. The default colour is black. To select a different colour, click the colour pot to the right of the Comp button. The colour picker appears. See Colour Picker. |
| Key In | The image that was used to pull the key. |
| Back | The background image that is revealed when the front is keyed. |
| Front | The image to which you applied the key. |
The selected curve changes to white.

(a) 255 (White) (b) Output (remapping of luminance values) (c) 0 (Black) (d) 0 (Black) (e) Input (current luminance values) (f) 255 (White)


