


Generating Mattes
Mattes can be used for several purposes. For instance, use a matte to remove colour spill, hue shift an object in an image for artistic effect, or match colours in a specific range. You can also output a matte for use in other modules such as Action or the Keyer. Use mattes to define the range of colour you want to modify in the result clip.
You can generate up to three mattes using the Selective menu.
To generate a matte for selective colour correction:
A black dot representing the sample appears on the hue cube. A red line also appears in the luma range and the sample is outlined in the 2D or 3D vectorscope. When you create the matte, you can modify the softness and tolerance boundaries to include or exclude the plotted colour.


| Click: | To define: |
|---|---|
| Pick Custom | The tolerance range based on a sample from the image. You must drag the cursor over the image to define initial tolerance. |
| R, G, B, C, M, or Yw | The tolerance range based on the selected colour channel. For example, click Yw to use the yellow channel to set the tolerance. The luma range is set to default tolerance and softness values. |
| Shadows, Midtones, Highlights | The tolerance range based on the selected luma range. These buttons expand the tolerance and softness boundaries to include all ranges of colours in the image. |
The initial softness and tolerance is set for the matte. The range you use to define the matte becomes visible through the greyscale image. The unselected colours remain greyscale.

(a) Original colour visible through the greyscale display.
The Active button associated with the selective is enabled when you set the initial softness and tolerance. When an Active button is enabled, the selective's matte will be applied to the result clip. You can disable the Active button at any time if you do not want to apply this matte to the result clip.
The range of colour used to define the matte is shown on the hue cube with tolerance and softness indicators. The light grey outline shows tolerance and the black outline shows softness. When you define a matte with a luma range, it is shown in the luma range—the white line indicates the tolerance and the yellow line indicates softness.
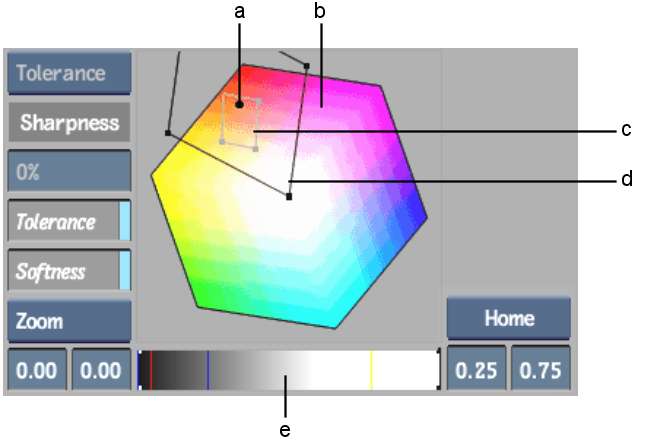
(a) Plotted colour (black dot) (b) Hue cube (c) Tolerance range (d) Softness range (e) Luma range
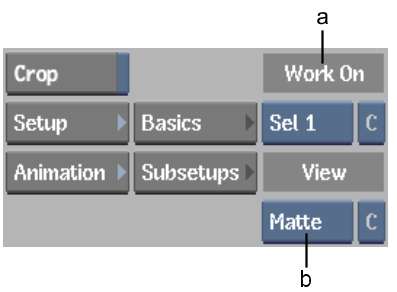
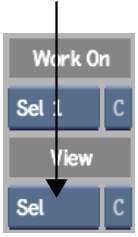
(a) Work On box (b) Selective View box
The matte appears in the image window. The black and grey areas of the matte can be colour corrected. The white areas will remain unaffected.
| Select: | To: |
|---|---|
| Tolerance | Add tolerance to the matte. |
| +Softness | Add softness to the matte. |
| -Softness | Remove softness from the matte. |
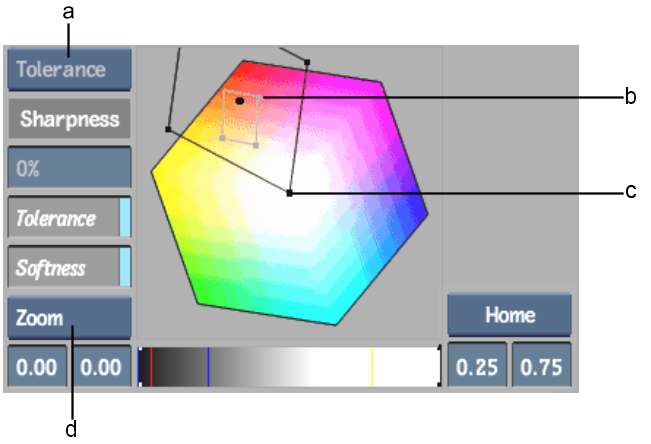
(a) Adjusting box (b) Tolerance handle (c) Softness handle (d) Move/Zoom box

(a) Softness range (b) Low Softness field (c) Low Tolerance field (d) Low bracket (e) Tolerance range (f) Plot line (g) High bracket (h) High Tolerance field (i) High Softness field
When working with 16-bit floating point images, you can press spacebar to pan the gradient bar, and Ctrl+spacebar to zoom the gradient. Select Home from the Frame Options box to reset the gradient to the default 0:1 position. If you have softness or tolerance values out of the 0:1 range, select Autoframe from the Frame Options box to view the complete gradient range. Select Plot Colour from the Frame Options box to enlarge the gradient to include the plot and reference colours.
You can select the selective in the Work On box from any menu in the Colour Warper to perform advanced colour corrections on the range defined by the matte. You can also change the view in the Selective View box.