Unwanted colour can be caused by factors such as inconsistent lighting conditions during a shoot or incongruities between the white levels set on a video camera and the given lighting conditions. Factors such as these can result in clips or images that contain unnatural looking colours or one predominant colour, which gives the image an unwanted colour cast. After setting black and white points, you can remove the unwanted colour without affecting the black and white levels. You can:
Not all colour casts detract from the natural appearance of the image. Before you remove a colour cast, it is best to analyse the image or clip, both in relation to other clips in the project and with an eye on maintaining the atmosphere, or mood inherent to the clip. For example, images of sunny summer days should have a reddish cast to convey an atmosphere of warmth. Completely removing the reddish cast may result in a colder feel than you want. In cases where the cast is a complementary one, you may want to refine it to improve the overall effect. See Creating Colour Casts.
The shadows, midtones, and highlights trackballs in the Basics menu are described as follows.


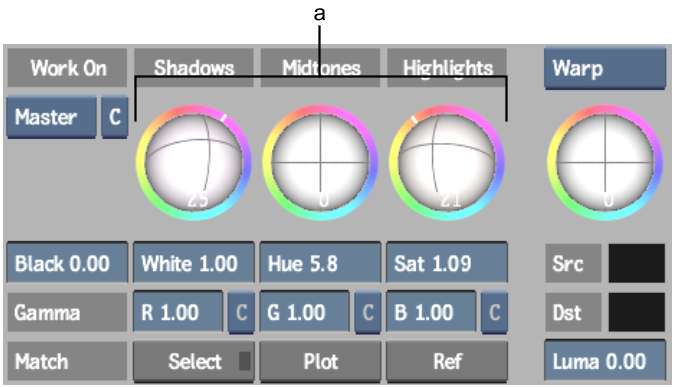
(a) Trackballs
Shadows trackballModifies the chroma in the low luminance area without affecting the luma.
Midtones trackballModifies horizontal RGB curves in the 2D luma histogram. These curves represent the amount of chroma tint you apply to the image. For example, if the red and green curves are above the middle line while the blue curve is below the middle line, you are adding a yellow tint to the midtones components of your image.
By default, the Midtones trackball affects all ranges except white and black, as shown by the histogram's RGB curves. To set the luma range affected by the Midtones trackball, use the two midtones triangles below the 2D luma histogram. Drag the triangles closer together to decrease the range and further apart to increase it. You can modify the range as many times as you like. When working with 16-bit floating point images, the midtones range is set to 0:1, and the midtones triangles can only be moved in this range.
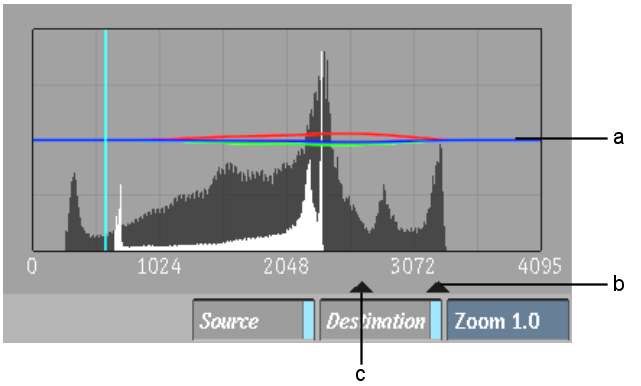
(a) RGB curves (b) Midtones triangle (c) Midtones triangle
Because you can modify the range that the Midtones trackball affects, the trackball will always return to its default reference value—when you release the Midtones trackball and apply the change, it will return to 0.
Highlights trackballModifies the chroma in the high luminance area without affecting the luma.
To remove unwanted colour using the Shadows, Midtones, and Highlights trackballs:
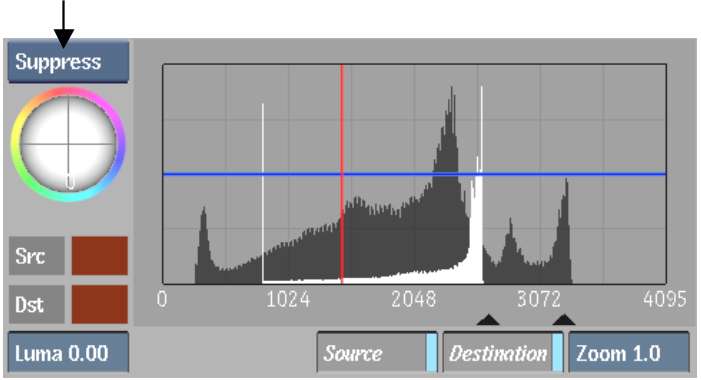
The sample (outlined in red) appears in the 2D or 3D vectorscope.
The chroma in the high luminance area of the clip is modified without affecting the luma.
The RGB curves in the 2D luma histogram reflect the changes you make. More of the unwanted colour is removed from the image (while still preserving luma) without affecting the black and white points.
To remove unwanted colour using the Suppression trackball:
The sample (outlined in red) appears in the 2D or 3D vectorscope.


