Create custom nodes of specific setups that you often use. A custom node can consist of a single node with specific settings or multiple nodes that create a particular effect.
Modular Keyer setups and Batch setups are saved separately. You cannot load a Batch setup into the Modular Keyer. In the same vein, you cannot save a Modular Keyer setup from Batch. If you want to save a Modular Keyer setup, you must save it from the Modular Keyer itself.
You create custom nodes by dragging individual nodes, groups, branches, or entire trees into the User/Project bin.
The selection is copied to the bin. The original selection remains in the schematic.


A similar configuration of nodes and clips that was used to create the custom node appears in the schematic. Because the Modular Keyer schematic does not support multiple front, back, and matte clips, the front, back and matte clips are converted to MUX nodes. In the same vein, the Result node is converted to a Matte Curves node. All Matte Curves settings from the setup’s Result node are saved with the Matte Curves node.

(a) MUX nodes converted from front, back, and matte clips (b) Matte Curves node converted from Result node
You can use custom nodes as often as you like. Each time you drag a custom node to the schematic, a new number is appended to its name.
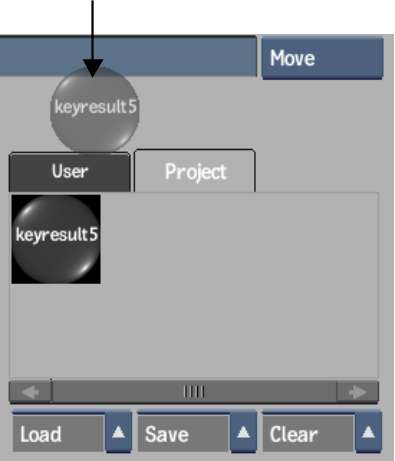
To manage the custom node bins:

(a) Load dropdown list (b) Save dropdown list (c) Clear dropdown list
| Select: | To: |
|---|---|
| Load Project Bin or Load User Bin from the Load dropdown list | Load custom nodes from another project or user. |
| Save Project Bin or Save User Bin from the Save dropdown list | Save the current custom nodes so they can be loaded by another project or user. |
| Clear Project Bin or Clear User Bin from the Clear dropdown list | Delete all custom nodes in the Project or User bin. |
To reorder a node in the User/Project bin:
If you dragged the node on top of an existing node, the existing node shifts to the right and the moved node is inserted in its place.
To delete a custom node from the User/Project bin:


