Create
custom bins and populate them with your most commonly used nodes
to optimize your workflow. As well, change the order of the tabs
along the top of the bin and rename them to reflect the contents
of a bin.
You can customize any
bin in the Tools bin except the All Nodes bin and its tab.
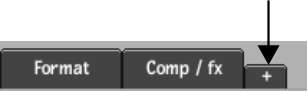
To create a tab:
- Click the plus sign tab.
- Name the tab in the keyboard that appears.
NoteYou can create a
maximum of 6 tabs.
To
copy a node to another bin:
- Drag the node on top of the destination
tab.
- Release the cursor when it changes to
a green crosshair.
- Click the destination tab when the standard
yellow cursor reappears.
The copied node appears
in the bin. Nodes are added to the end of a bin in the order copied
(following the same alphabetical node order of the rows, from top
to bottom of each row).
NoteNodes cannot be duplicated
within the same bin.
To
move a node to another bin:
- Press Ctrl+Alt and
drag the node on top of the destination tab.
- Release the cursor when it changes to
a green crosshair.
- Click the destination tab when the standard
yellow cursor reappears.
The node is moved from
its original location to the destination bin. Nodes are placed at
the end of a bin in the order moved (following the same alphabetical
node order of the rows, from top to bottom of each row).
NoteNodes cannot be duplicated
within the same bin.
To
move a node to the schematic:
- Press Ctrl+Alt and
drag a node to the schematic.
The node is moved from
the bin and placed in the schematic.
To
reorder a node within a bin:
- Press Ctrl+Alt and
drag the node to a new location. You can move nodes from one row
to another as well as reorganize nodes within a row.
In the following example,
the AutoMatte node is dragged on top of the Degrain node.
- Release the cursor when it changes to
a green crosshair at the location where you want the node moved.
If you dragged the node
on top of an existing node, the existing node shifts to the right
and the moved node is inserted in its place. In the following example,
the AutoMatte node is inserted in the place of the Degrain node,
and the Degrain and Regrain node shift to the right.
To reset a bin to alphabetical layout:
- With the applicable bin active, click
Sort.
The nodes in the bin
are reset to their alphabetical layout.
To delete a bin:
- Press Ctrl+Alt and
drag the tab to the bottom of the screen.
- Release the cursor when it changes to
a delete cursor.
WarningThere is no undo
capability when deleting a bin.
The entire contents of
the bin, including the tab, are deleted.
To
delete a node from a bin:
- Press Ctrl+Alt and
drag the node to the bottom of the screen.
- Release the cursor when it changes to
a delete cursor.
WarningThere is no undo
capability when deleting a node.
To rename a tab:
- Click the Rename Tab button.
- Enter a new tab name in the keyboard
that appears.
To reorder a tab:
- Press Ctrl+Alt and
slide the tab to its new location.
- Release the cursor when it changes to
a green crosshair at the new location for the tab.
If you dragged the tab
on top of an existing tab, the existing tab shifts to the right
and the moved tab is inserted in its place.
To save a bin layout:
- Click Save Bin Layout.
- Name the layout.
The layout of the entire
Tools bin is saved, including all new and customized bins. You cannot
save only select bins.
Layouts are saved per user, not by project.
To load a bin layout:
- Click Load Bin Layout.
- Select the layout you want to load.
Each customized bin,
including all new bins, is loaded into the Tools bin.
NoteIf you load a bin
layout containing unsupported nodes, the unsupported nodes do not appear.