


Automatic Object Tracking
If the image sequence you are tracking has multiple moving objects, you can perform object tracking to track these objects relative to the same camera. You can select the camera to which the object tracking results conform, or use the camera generated from previous camera tracking analysis. For example, you can perform a camera tracking analysis on the complete scene, then use mattes to perform multiple object tracking passes focusing on various moving objects in the scene. Each result can be converted to separate axes, but all results conform to the camera created by the original camera tracking.
To create an automatic 3D track based on object properties:


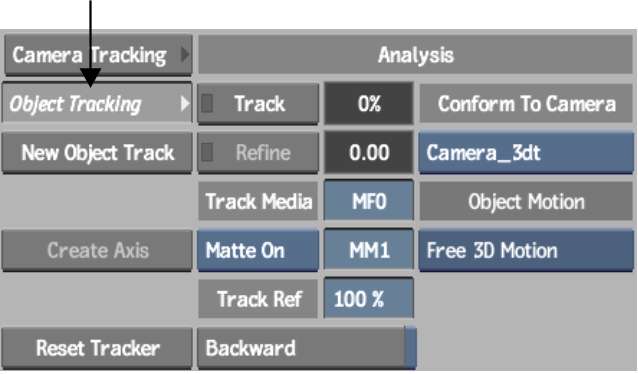
White areas of the matte are considered for calculating the solution; black areas are ignored (or vice-versa for Matte Invert).
| Select: | To: |
|---|---|
| Free 3D Motion | Track an object moving independantly from the camera. |
| Orbit Around Cam | Track an object rotating around the camera, or far away from the camera. |
| Auto Detect | Automatically detect the motion type of the object and track accordingly. For small objects, Auto Detect may not be able to establish the proper motion. In this case, select Free 3D Motion or Orbit Around Cam. |
![]()
| Enable: | To display: |
|---|---|
| Trackers | 2D tracks. Use the colour pot to select the colour of the tracks. |
| Points | 3D points. Use the colour pot to select the colour of the points. The points option is also available in the Display section of the Setup menu (or with the hotkey Alt+D), so that you can enable the display of 3D points while working in other Action menus. 3D points are viewable in 3D in all Camera views in Action (Side, Front, Top, or Camera) to help you position objects in the reconstructed scene. |
You can also adjust the transparency of the trackers and points, and the size of the points in your image.
Use the Grid box to display a grid so that you can position objects in the scene more accurately. The same Grid box is available in the Display section of the Setup menu.

Most of the time, tracking occurs in the background, allowing you to continue working while tracking. In Batch, you can use connected input and matte clips as the media to be tracked. If this case, tracking becomes a foreground process.
You can see a progress indicator beside the Track button. You can interrupt the analysis and resume it by clicking Track again. After tracking has completed and you press Confirm, the Track button changes to Calibrate, and you can see the 2D tracks and 3D points in your image.

Name fieldDisplays the name to be given to the parent axis after you convert the analysis into axes. You can rename it to a better name to reflect which object you are tracking.
Scale fieldDisplays the scale of the tracked object. After tracking has occurred, you can set the scale of the tracked object. Since you are tracking a specific object as part of an image, setting the relative scale of the object in relation to the image helps you to position objects in the reconstructed scene when you convert the 3D points into axes.