You can animate a mask by applying tracking data to it. This is useful when you want a garbage mask to follow a moving element in a clip. To do this, you can either:
You can track an object on the front or back clip and apply the tracking data to the axis of a mask, or to a hierarchy of masks.
Each vertex you select is assigned a tracker in the Stabilizer. The vertices are repositioned according to the reference points that you set in the Stabilizer.
When you apply tracking data to a mask, only the mask axis, or position of selected vertices, is animated. Any other keyframes set for the mask are disregarded. You can, however, animate individual vertices after applying tracking data to your mask's axis or to individual vertices. It is especially useful to manually adjust the tangent handles of the vertices at different frames where needed.
To animate an entire mask with tracking:
The Garbage Mask menu appears.


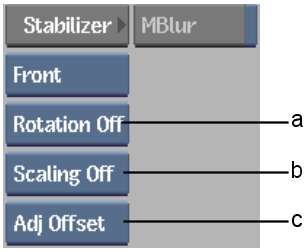
(a) Clip box (b) Rotation and Scaling options (c) Adjust box
| Select: | If the selected mask is: |
|---|---|
| Adj Offset | Parented to one axis. |
| Adj Axis | Parented to a hierarchy of objects. |
Fine-tune your analysis if necessary. For more information, see About Tracking and Stabilizing.
The Garbage Mask menu reappears. The tracking data is applied to the mask.
To animate individual vertices on a mask with tracking:
The Garbage Mask menu appears.
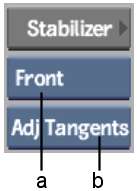
(a) Clip box (b) Adjust box
The tangents for the selected vertices are adjusted while the points are being tracked.
The Stabilizer appears. The trackers are automatically placed in the position of the selected vertices. Reposition if needed.
Fine-tune your analysis if necessary. For more information, see Tracking and Stabilizing.
The Garbage Mask menu reappears. The tracking data is applied to the selected vertices on the mask.


