Use the following options in the Setup menu to improve the output and reduce processing time.


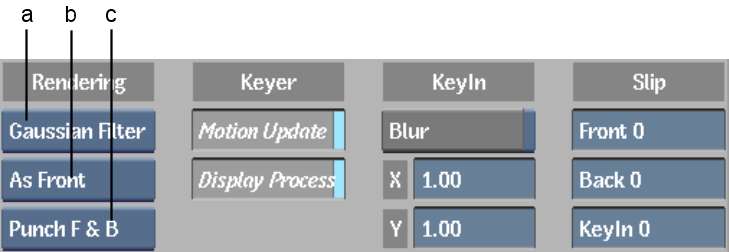
(a) Rendering control (b) Slip controls (c) Punch box
You can render interlaced or progressive frames. If you select the Interlaced option in the Rendering box, the Keyer combines the two fields and renders each frame. If you select the Interlaced option, the Keyer renders each field separately. Use the Interlaced option if the two fields in the image are not properly aligned and if the filters you are using are not applied to the proper pixels.
A third option, As Front (or As Input if you have accessed the Keyer from Action), renders using the mode that corresponds to the source clip (or the scan mode attribute of the Action media).
When you pull a key, a matte is created for both the front and back images. If you modify the luminance curves for both mattes, you can specify whether both mattes are used in the generation of the composite clip, or only the back matte. To do this, use the Punch Mattes options:
When the front matte is not used, the entire front image is used, and the curves calculation maps all the black areas of the front clip as transparent. For complete details about the Blending menu, see Using the Luminance Curves.
Displaying the Key while Processing
In the Setup menu, enable the Display Process button to view the composite clip as it is processed. When this button is disabled, the image window remains at frame 1 during processing. You can reduce processing time by disabling Display Process.
You can offset the front, back, and key-in clips using the Slip fields in the Setup menu. You can delay the start of a clip or start anywhere in a clip; this way you do not have to exit the Keyer to edit the length or sequence of a clip.


