You use the Channel Editor to create animations. Almost all Flame modules link directly to the Channel Editor. Its interface and functionality remain the same across all modules, while the specific animation channels correspond to the module itself as follows:
The Channel Editor has three channel views, each of which is used to control and coordinate different aspects of your animation.


| Select: | To display: |
|---|---|
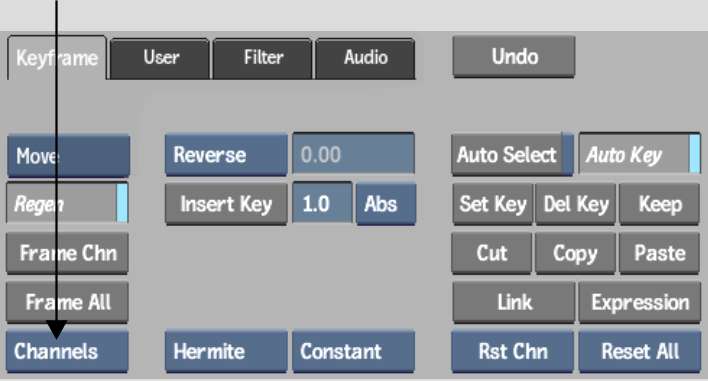
| Channels | The Animation Curve window. Use the Animation Curve window to edit the animation curve, as well as the timing and values of the individual keyframes and tangents that compose each channel. |
| Tracks | The Track Editor. Use the Track Editor to edit the timing of the overall animation channel, as well as the timing of the individual keyframes that compose each channel. |
| Info | The Information Table. Use the Information Table to view the animation channels of your scene with corresponding values, along with applied expressions which you can work with, in a list. |
These view options are also available from the View box in all modules. When you select Channels, Tracks, or Info from the View box, the image window (or current viewport) displays the selected view.
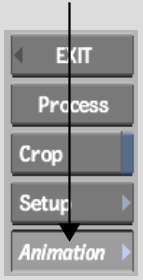
To view the Channel Editor in the image window, swipe the bar at the left or right side of the menu. Swipe the bar again to view the clip in the image window.
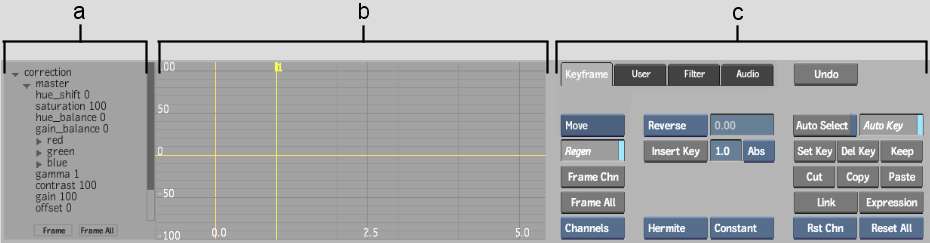
(a) Channel hierarchy (b) Animation Curve window (c) Animation controls
The Channel Editor includes the following components.
Channel hierarchyOrganizes the channels of a particular module in a hierarchy of folders. The folders contain channels that are grouped based on the properties they animate.
When the channel hierarchy first appears, only the top-level folders are shown. You can expand these folders to set values for specific channels by clicking the arrow next to the folder name. For example, the Scale folder contains channels for scaling the object on the X and Y plane. Channels are indented and appear below their folders.
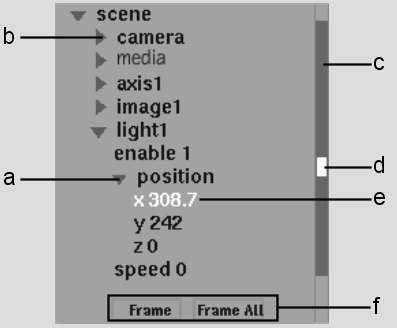
(a) Expanded Position folder (b) Camera folder (c) Scroll bar (d) Indicates the relative position (e) Value (f) Framing buttons
In the channel hierarchy, the value for the current frame is shown beside the channel name.
Animation controlsUsed to create and modify keyframes, filter the display of channels and keyframes, and create and modify animation expressions. There are common elements to the animation controls, as well as specific menus depending on what tab is selected. See:
Animation Curve windowPlots keyframes on a curve and indicates the current keyframe position when you select the channel name. Selecting a complete channel highlights its curve and its name in the channel hierarchy in white. When you select a folder, the animation curves for all channels in the folder are highlighted. Partially selecting a channel (that is, not all keyframes are selected), highlights its curve and its name in the channel hierarchy in yellow. Unselected channels and keyframes are highlighted in black.
Keyframes turn white when selected and black when unselected. You can select keyframes from different channels to manipulate them.
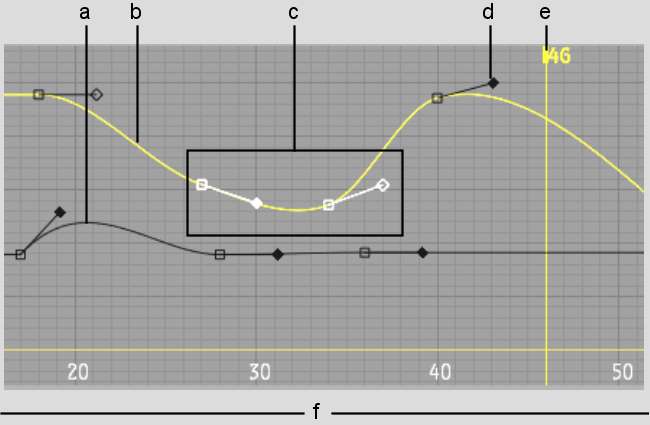
(a) Unselected channel (b) Partially selected channel (c) Selected keyframes (d) Tangent handle (e) Current frame (f) Frame number
The frame number in the animation is mapped along the horizontal axis, ranging from 0 at the origin to the total number of frames (shown in the Total Frames field) at the right. The vertical bar indicates the frame currently in the image window.
The channel value is mapped on the vertical axis, increasing upward and decreasing downward. The range depends on the portion of the curve being framed.
When you set a value for a channel at a particular frame, it becomes a keyframe in the animation. Keyframes on an animation curve with Hermite or Natural interpolation display tangents with which you can control the slope of the curve. See Setting Interpolation.
Track EditorDisplays keyframes along a horizontal bar and indicates the current keyframe position when you select a channel. You can change the timing for keyframes or set new keyframes. However, you cannot change a keyframe's value or its tangency. For example, if a keyframe indicates a particular X position value for a light in Action, you can use the Track Editor to change the time at which the light will be located at this X value, but you must use the Animation Curve window, the channel hierarchy values, or the menu of the module, to change the X value itself.
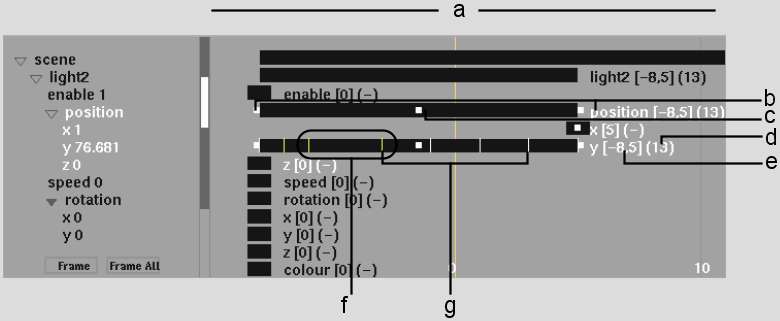
(a) Track duration (b) Left/right handles (c) Middle handle (d) Number of frames in track (e) First and last frames in track (f) Selected keyframes (g) Keyframes
The frame number in the animation is mapped along the horizontal axis, ranging from 0 at the origin to the total number of frames (shown in the Total Frames field) at the right. The vertical bar indicates the frame currently in the image window.
The position and length of a track is determined by the first and last keyframes for the channel it represents. The track extends from the frame number of the first keyframe to the frame number of the last keyframe. The frame numbers for the first and last keyframes appear to the right of the track and are shown in square brackets [1, 32], and the total number of frames is shown in parentheses (32). If a channel contains no keyframes, the number zero appears in square brackets [0] and a dash appears in parentheses (-) beside the track.
Selecting a channel also highlights its track. When you select a folder, the animation tracks for all channels in the folder are highlighted. Keyframes appear as white vertical lines intersecting the track, and turn yellow when selected.
When you select a track, three handles appear as white squares on the track. You use the middle handle to translate the track in time, and the left and right handles to scale the overall duration of the track.
Information TableDisplays a table of channels present in the scene, sorted by channel value, keyframe, and expression. Viewing channels in a tabular format makes it easy to navigate the channel hierarchy and locate keyframe information. See Viewing Channels in a Table.
In the Information Table, you can also see and work with expressions applied to tracks. See Working with Expressions in the Channel Editor.
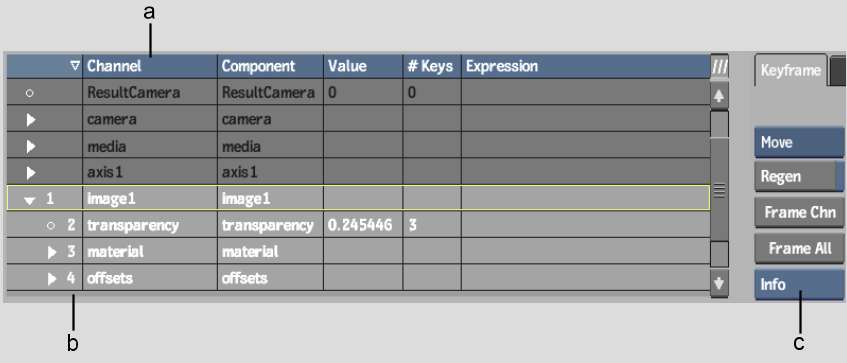
(a) Channel column heading (b) Selection order (c) Channel View box


