Painting models using the 3D paint tools is extremely useful, however, there may be times when being able to paint on the model as a flattened version (as it appears in the UV View) can be very useful.
The Flatten to UV Space feature (Mesh > Flatten to UV Space) (Hotkey: Alt + T) lets you paint on a flattened representation of the mesh.
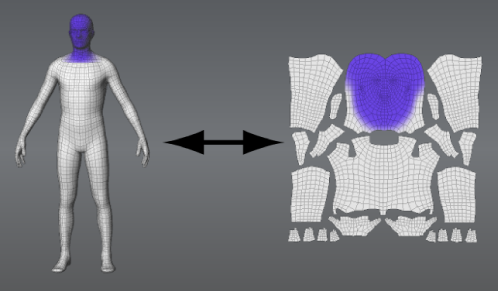
Flatten to UV Space creates a copy of the selected model with vertex positions that are identical to the UV texture coordinates of the original 3D model so you can paint or edit your textures on a flattened version. The original model is made temporarily invisible to let you paint on the 2D copy.
Since the model is flattened and laid out as it appears in the UV View it becomes much easier to correlate how the painted textures appear in relation to the UV shells without having to switch to the UV View.
Since all components of the model are visible in a flattened layout, you can:
In addition, The Flatten to UV Space feature can be used for minor repositioning of UV texture coordinates on the flattened 2D version. For more information, see To adjust UV positions on a flattened model
You can flatten one or more models at time if necessary by selecting them using the Objects selection tool.
A copy of the selected model is created as a flattened version with vertex positions that are identical to the UV texture coordinates on the original model. The model appears unfolded exactly like its associated UVs so may likely appear in multiple flattened pieces.
The original 3D version of the model is made temporarily invisible. (This is evident in the Object List). By default, the flattened model appears in the same camera position as the 3D version.

If multiple meshes are flattened at once, they may appear on top of each another in the 3D View. You can select each mesh in turn and translate them apart from each other in order to paint on them.
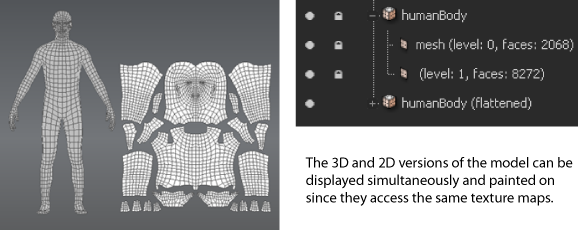
Now you can paint on either version of the model and the associated texture maps will update automatically.
To adjust UV positions on a flattened model
The Flatten to UV Space feature can be used to perform simple repositioning of UV texture coordinates on a flattened 2D version of a model.

For example, the Pinch, Grab, or Smear tools can perform basic UV position adjustments on the model since they work within the plane of the flattened surface vs. along the normal. Other sculpt tools displace the vertices normal to the mesh so are not suitable for UV edits. For more extensive UV modifications it is recommended that another application with UV editing capabilities be used.
You can flatten one or more models at time if necessary by selecting them using the Objects selection tool.
A copy of the selected model is created as a flattened version with vertex positions that are identical to the UV texture coordinates on the original model. The model appears unfolded exactly like its associated UVs so may likely appear in multiple flattened pieces.
The original 3D version of the model is made temporarily invisible. (This is evident in the Object List). By default, the flattened model appears in the same camera position as the 3D version.
If multiple meshes are flattened at once, they may appear on top of each another in the 3D View. You can select each mesh in turn and translate them apart from each other in order to paint on them.


