Use
Assemble mode when recording on a tape that contains a valid control
track up until a certain point, but you need to record beyond that
point. In Assemble mode, you are attaching video and audio to existing
material. For example, yesterday you played out your work onto a
blank tape using Record mode. Today, you have completed additional
work and would like to add it to the end of the tape. In this case,
you cue the tape to the in point (at a point where there is a valid
control track) and begin playing out in Assemble mode. The timecode is
continued from the previously recorded material.
NoteWhen recording to
tape, you can only configure specific video and audio tracks to
play out if you are in Insert mode.
To record in Assemble mode:
- Set the VTR to Regen timecode.
- Before you can play out to a VTR, you
must render the timeline at the appropriate video resolution. See
Rendering Shots and
Playout Workflow.
- Click Editing, and then click Playout
to display the Playout menu.
- Select a raster for playout. See
Selecting a Raster for Playout.
- In the Sync Mode list, select the synchronization
mode. See
Playout Menu Options.
- (Optional) To record only a portion of
the timeline, use markers to define where, in the timeline, you
wish to start and stop recording to tape. See
Defining In and Out Markers when Playing Out to Tape.
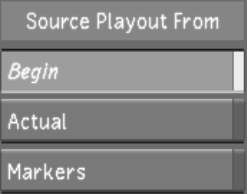
- In the Source Playout From group, determine
where the playout operation starts.
| Click: |
To start the playout: |
| Begin |
From the start of the current timeline. |
| Actual |
At the current frame. |
| Markers |
At the in marker in the timeline, and stop at the out
marker.
|
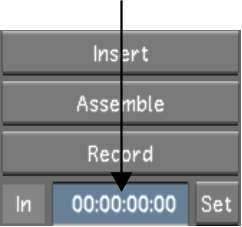
- In the In field, enter the tape timecode
where the video is to be edited.
TipTo find the desired
timecode more quickly, click the Source Timecode field next to the
playback controls while still in the Playout menu. The playback
controls and Source Timecode field turns blue to indicate that they
can be used to control the VTR. Scrub to the desired timecode, then enter
it in the Tape Rec IN field.
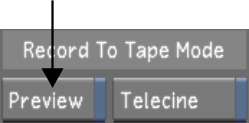
- (Optional) In the Record To Tape Mode
group, enable Preview.
With Preview enabled,
your footage is played out in the Player, but nothing is written
to tape. The Insert button turns green after the first click to
show that the action is non-destructive.
- (Optional) Enable Telecine. See
Writing Telecine-Style Tape.
- (Optional) Configure video and audio
record delay. See
Playout Menu Options.
- Click Assemble, then confirm the action.
Tip To record a single
shot as opposed to the entire timeline, select the shot you want
to play out and hold down SHIFT while
clicking Assemble.
The playout operation begins.