Using the Point Tracker


You can use the Point Tracker to stabilize a repositioned shot.

To assign tracking information to the pan and scan settings of an image:

  1. Make sure the aspect ratio value is set up as needed. See Setting the Aspect Ratio.
  2. Select the shot to track.
  3. Click Colour, and then click Secondaries to display the Secondaries menu.
  4. Select the tracking feature by clicking Tracker.
  5. Select the Point Tracker by clicking Point.
  6. Enable a new tracker by clicking New.

    Show small imageShow large image

    (a) Tracker button (b) Point button  (c) New button  

  7. Click the tracking point in the image.
  8. Click Image, and then click Reposition to display the Reposition menu.

    A tracking box appears. You can adjust the box as needed to improve the track.

  9. Click one of the Analyse buttons to begin the tracking process.

    The system tracks the tracking point. After tracking is complete, you may need to make slight adjustments to the tracking data. See Animating the Point Tracker.

    Show small imageShow large image

    (a) Analyse backwards  (b) Analyse back one frame  (c) Analyse ahead one frame  (d) Analyse forward  

  10. Enable either Racking or Reposition.
  11. If you enabled Reposition, scale the image as needed.
  12. Click Assign to apply the tracking data to the shot.

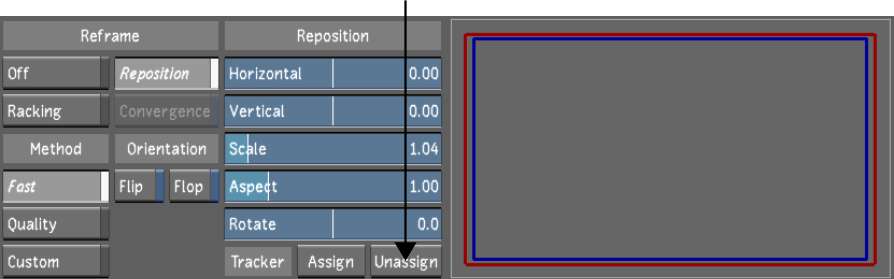
    If you enabled Racking, the tracking point remains fixed vertically. If you enabled Reposition, the tracking point remains fixed both horizontally and vertically.

To turn off tracking data for a shot:

  1. Display the Reposition menu. See Accessing the Reposition Menu.
  2. Click Unassign.

    Show small imageShow large image