You can create an audio fade or crossfade in the same way you add a dissolve to video elements. When creating an audio fade, you specify the duration of the fade, the interpolation for the fade-in and fade-out, and the rate of the fade.
You can also create an audio fade to or from silence.


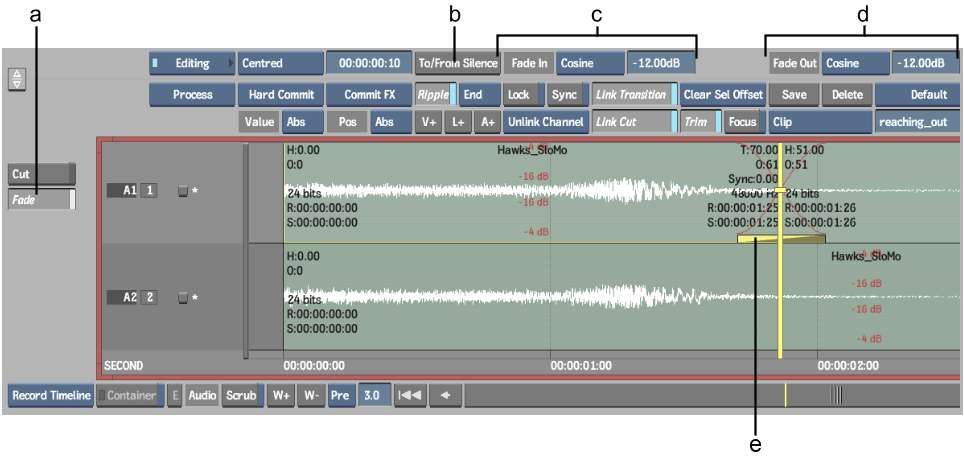
(a) Fade button (b) To/From Silence button (c) Fade In controls (d) Fade Out controls (e) Fade icon
A fade icon is added to the timeline. If you enabled waveforms, the interpolation curves appear on the audio elements.
The fade icon is split into two separate fades. One fade ends at the cut and the other starts at the cut. You can control these fades separately.
| Select: | To: |
|---|---|
| Linear | Create a linear fade. The slope of the fade curve is constant. See Linear Fades. |
| Cosine | Create a a fade with a cosine curve. You can modify the shape of the curve by adjusting the Rate value. See Cosine Fades. |
| Exponential | Create a fade with an exponential curve You can modify the shape of the curve by adjusting the Rate value. You can modify the direction of the curve by modifying the Alpha value. See Exponential Fades. |
When you create a linear fade, the rate of the fade-in or fade-out is constant. This may make the fade sound abrupt because the human ear is very sensitive to changes in loudness level. If you want to make a fade sound more natural, try using a cosine curve instead.
You can view the curve by selecting the dissolve icon and clicking W+. The curve appears on the audio element.
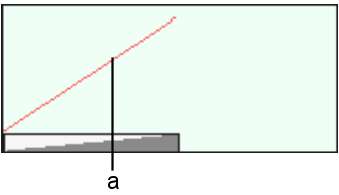
(a) Linear fade curve
When you create a cosine fade, the default rate of the fade-in or fade-out eases in and eases out. This gives a more natural sounding fade because the beginning and ending of the fade is not as noticeable to the human ear (the majority of the fade occurs at the middle of the curve.) You can view the curve by selecting the dissolve icon and clicking W+. The curve appears on the audio element.
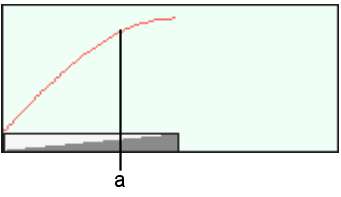
(a) Cosine fade curve
When you create a cosine fade, a Fade Curve Rate box appears in the Dissolve menu.

(a) Fade Curve Rate box
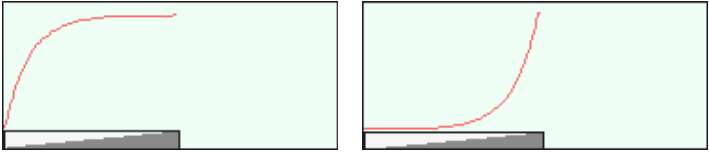
Use the Fade Curve Rate value to adjust the shape of the curve. The following illustrations show the difference between a cosine fade-in with a low curve rate, and a cosine fade-in with a high curve rate.
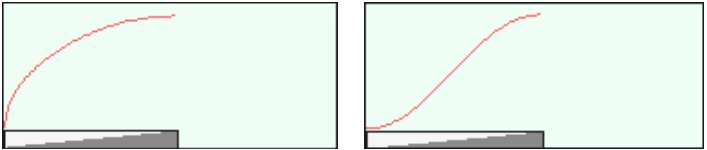
Fade Curve Rate = -0.01 dB Fade Curve Rate = -12.00 dB
When you create an exponential fade, the default rate of the fade-in or fade-out is rapid at the beginning, and slows down at the end of the fade. You can view the curve by selecting the dissolve icon and clicking W+. The curve appears on the audio element.
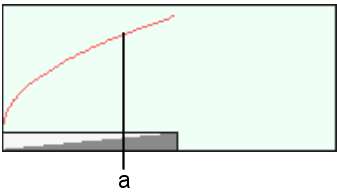
(a) Exponential fade curve
When you create an exponential fade-in, a Fade Curve Rate box and an Alpha box appear in the Dissolve menu.

(a) Alpha box
Use the Alpha value to adjust the shape of the curve. The following illustrations show the difference between an exponential fade-in with a negative alpha, and an exponential fade-in with a positive alpha.
Alpha = -1.00 dB Alpha = 1.00 dB
When you add a dissolve between two audio elements, you create a crossfade. When you add a crossfade, a Fade Curve Rate box and an Alpha box appear for both the fade-in and the fade-out. You can control the fade curve for each audio element independently.

The following diagrams show a crossfade with an exponential fade-in and a cosine fade-out.
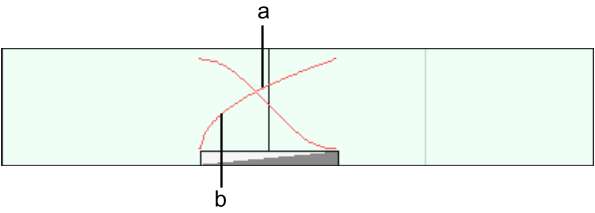
(a) Cosine fade-out (b) Exponential fade-in
Experiment with different fade-in and fade-out types to achieve the most natural sounding crossfade. For example, if the two audio elements are at noticeably different loudness levels, adjust the fade curves to get an even transition between the loudness levels.


