


Advanced Editing of the
Conversion LUT Curve
After you modify the basic conversion LUT curves, you may want to further refine the final result. To do so, you can use advanced editing tools. With advanced editing, you modify additional curves for the red, green, and blue channels to fine-tune the final conversion LUT and bring out or hide detail in specific areas. These curves have editable points, adding flexibility in how they affect each channel in the final conversion LUT.
You can modify the shape of each advanced editing curve using control points. Modifications you make to these curves influence the curve of corresponding channels in the final conversion LUT. For example, you can add points to the advanced editing curve for the red channel, and by dragging the points, affect the slope of the red channel's final conversion LUT curve.
The modifications you make to the basic conversion LUT curves and the advanced editing curves are independent. The final LUT that you generate, however, is a single curve (or set of R, G, and B curves) that consists of basic LUT curves and adjustments you make with advanced editing curves.
To perform advanced editing of the conversion LUT curve:


Additional advanced editing curves appear for the red, green, and blue channels. RGB curves use blending to distinguish overlapping curves. For example, when all RGB curves overlap, a white curve is produced, whereas green and blue overlapping curves produce a cyan curve.
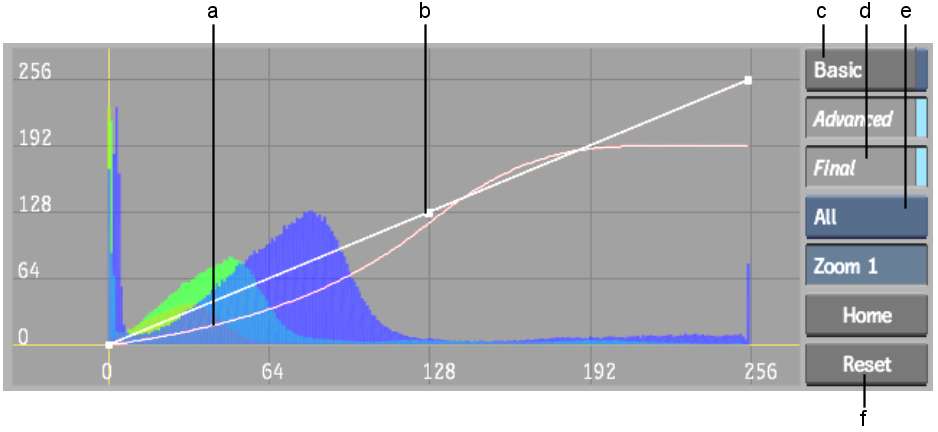
(a) Red, blue and green overlapping advanced editing curves (b) Control point (c) Basic button (d) Final button (e) Edit Curve box (f) Reset button
The corresponding channel's basic and advanced editing curves are displayed. The histogram only displays values for the selected channel.
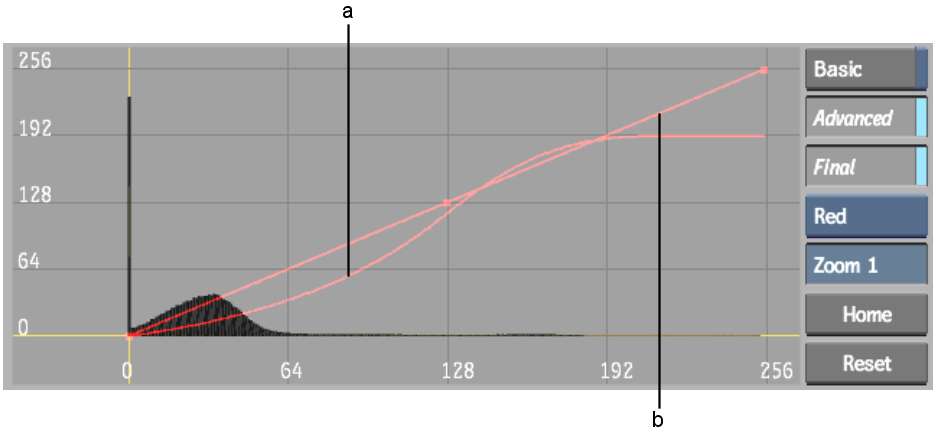
(a) Color channel selected in Edit Curves box (b) Color channel's advanced editing curve
| Select: | To: |
|---|---|
| Add | Add control points to an advanced editing curve. With Add selected, click either the red, green, or blue advanced editing curve. |
| Delete | Delete control points from an advanced editing curve. With Delete selected, click a point on the red, green or blue advanced editing curve. |
| Move | Move control points. With Move selected, drag the points, or press Ctrl-drag to select multiple points. |
| Zoom | Zoom in on the curves. With Zoom selected, drag over the curves right or left to zoom in or out. |
| Rect Zoom | Zoom in on a section of the curves. With Rect Zoom selected, drag a selection box to zoom in on the area of the curves contained by the selection box. |
| Pan | Pan the curves. With Pan selected, drag over the curves to pan the curves in any direction. |
Dragging control points of advanced editing curves affects the basic curves and the colour effect is immediately reflected in the clip.