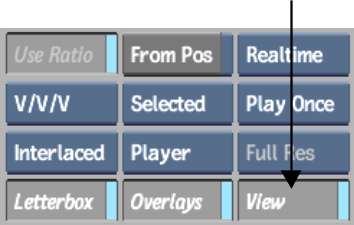
Use the View options to display images from two video tracks simultaneously. The tracks can be stereo or mono. You can select which layer of the track that you want to display. You can view the two tracks in a split screen. Alternatively, the two tracks can be viewed as a transparency blend or with a clamped or non-clamped difference. The two tracks viewed are the Primary and Secondary tracks.
If you are working with a clip containing a stereo track, you can select how you want to preview the stereo results.
To compare Primary and Secondary tracks in the Player:


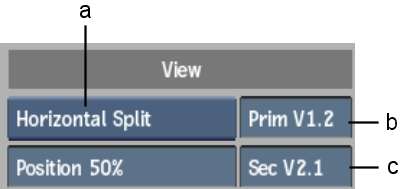
(a) Preview Setup box (b) Primary Video Track field (c) Secondary Video Track field
In this example, layer 2 of video track 1 is assigned as the Primary track and layer 1 of video track 2 is assigned as the Secondary track.
| If you selected: | Do this: |
|---|---|
| Horizontal or Vertical Split | Set the position of the split. |
| Angle Split | Set the position and angle of the split. |
| Difference | Set the difference between the two tracks. You can set the minimum and maximum threshold values to be clamped or non clamped. To adjust the maximum clamp value, enter a value in the Max field, or press Shift+U and drag left or right. To adjust the minimum clamp value, enter a value in the Min field, or press Shift+Y and drag left or right. |
| Blend | Set the percentage of the Secondary track to display. For example, if you specify 60%, the image is composed of a blend of 40% of the Primary track and 60% of the Secondary track. Set a value in the Blend field or press Shift+T and drag left or right. |
Example: To preview stereo results in a Stereo Anaglyph mode:
The View controls appear. Stereo is automatically selected in the Preview Setup box.
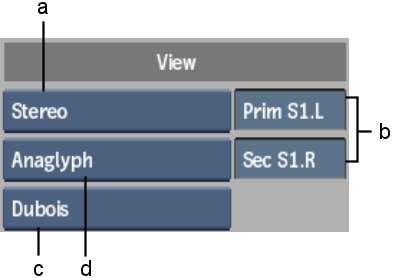
(a) Preview Setup box (b) Primary and Secondary Video Track fields (c) Stereo Anaglyph box (d) Stereo Preview box
In this example, the left eye layer is assigned as the Primary track and the right eye layer is assigned as the Secondary track.
| Select: | To view: |
|---|---|
| Diff | The difference between the two images, with the minimum and maximum threshold values non clamped. |
| Diff Clamped | The difference between the two images, with the minimum and maximum threshold values clamped. To adjust the maximum clamp value, enter a value in the Max field, or press Shift+U and drag left or right. To adjust the minimum clamp value, enter a value in the Min field, or press Shift+Y and drag left or right. |
| Blend | A combined image of the two tracks. To adjust the Blend factor, enter a value in the Blend field, or press Shift+T and drag left or right. |
| Mono | The image with just the anaglyph effect. The RGB values are removed from the display. |
| Dubois | The image with reduced ghosting between the left and right eyes. |


