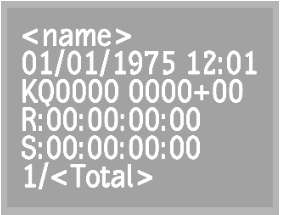
Use the Burn In tools to burn-in clip information such as timecode, keycode, and frame numbers. The information appears as text on your clip for your reference.
When mixing clips that originate from formats with different timecode, you can burn-in information on a clip to keep a timecode reference clip.
Burn-in the keycode data of the clip with the Burn In tool. The burn-in ensures that keycode data is not lost as frames progress through the work pipeline of your Autodesk Visual Effects and Finishing application. The burn-in can also help when going through other applications. See Ways that Timecode and Keycode is Preserved or Destroyed.
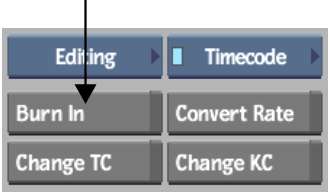
To burn-in clip information from the Burn In menu:


The selected information on the clip is shown in the sample frame. See About the Burn In Menu.