Grids and guides are reference overlays that appear over the image window in modules.
Use grids to view an overlay for spatial reference in your clips. A lattice of horizontal and vertical lines can be helpful when trying to place objects in a scene. You can even enable snap-to-grid functionality to ensure the accuracy of your placement.
Use guides to overlay horizontal and vertical reference lines. You can verify the working area, frame aspect ratio, safe areas for action and text, and the centre of the working area. You can also set up free guides for non-standard horizontal and vertical references.
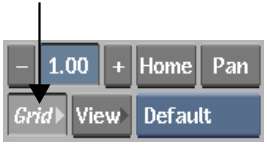
Grids and guides are accessible from all modules using the Grid menu. However, not all modules support all grids and guides features.
| Use the controls in: | To: |
|---|---|
| Working Area | Define the area relevant to the output result. See Setting Up Working Area Guides. |
| Free Guide | Set up a freely defined rectangular overlay. See Setting Up Free Guides. |
| Guide | Display aspect ratio guides. See Setting Up Aspect Ratio Guides. |
| Safe | Display safe text and safe action areas. See Setting Up Safe Area Guides. |
| Grid | Display reference grids. See Setting Up Grids. |
| Centre | Display the centre point of the working area. See Displaying a Centre Point. |
To reset grids and guides to the default settings, click Reset All in the lower-right corner of the Grid menu.
Selecting Grids and Guides Presets
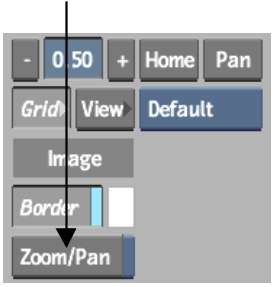
You can display grids and guides presets without having to enter the Grid menu.
To select grids and guides presets:


| Select: | To: |
|---|---|
| PAN_16x9_to_4x3 | Display reference guides for panning and scanning a 16x9 clip to a 4x3 format. |
| TILT_to_16x9 | Display reference guides for a 16x9 letterbox clip in a 4x3 ratio. |
| TILT_to_14x9 | Display reference guides for a 14x9 letterbox clip in a 4x3 ratio. |
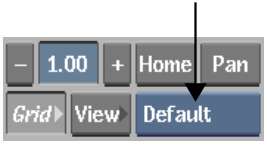
| Default | Display the grids and guides currently defined in the Grids and Guides menu. |
| Quick Off | Turn grids and guides off. |
Saving Grids and Guides Setups
You can save grids and guides setups to your user ~/guides directory.
Loading Grids and Guides Setups
You can load grids and guides setups that reside in other directories.
Setting Up Working Area Guides
Set up working area guides to delimit the relevant area in the frame. For example, if you are working on a film project, audio is printed in a thin strip on the side of each frame. You can set up the working area guides to indicate only the part of the film frame that is not affected by the audio print.
To set up a working area guide:
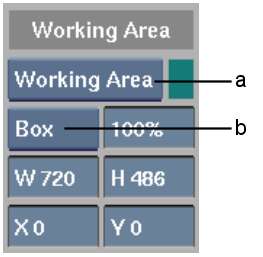
(a) Working Area box (b) Overlay Type box
| Select: | To: |
|---|---|
| Line | Indicate the working area by outline only. |
| Box | Cover the area outside the working area. |
A free guide is a rectangular overlay that you can set up to mark a region of the frame. This may be useful if you are working on a background graphic for a composite where a picture-in-picture effect is applied.
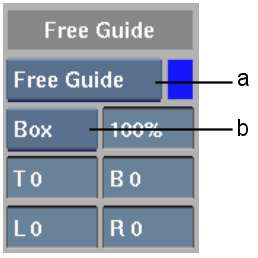
(a) Free Guide box (b) Overlay Type box
| Select: | To: |
|---|---|
| Line | Indicate the working area by outline only. |
| Box | Cover the area outside the working area. |
Setting Up Aspect Ratio Guides
Aspect ratio guides provide an overlay for the aspect ratios of broadcast and film formats. Use the guides when you are working on a format that you will deliver in another format. By selecting the delivery format's aspect ratio, you can preview the result without processing the format conversion.
If the aspect ratio you need an overlay for is not among the preset options, you can create custom aspect ratio guides based on a decimal aspect ratio or on pixel values.
To set up a preset aspect ratio guide:
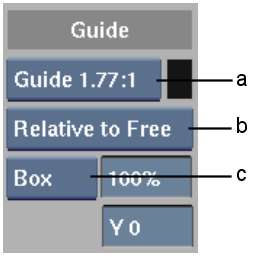
(a) Aspect Ratio box (b) Relative box (c) Overlay Type box
| Select: | To: |
|---|---|
| Line | Indicate the working area by outline only. |
| Box | Cover the area outside the working area. |
| Select: | To define the aspect ratio guide relative to: |
|---|---|
| Relative to Border | Frame border. |
| Relative to Work | Working area. |
| Relative to Free | Free guide. |
To set up a custom aspect ratio guide:
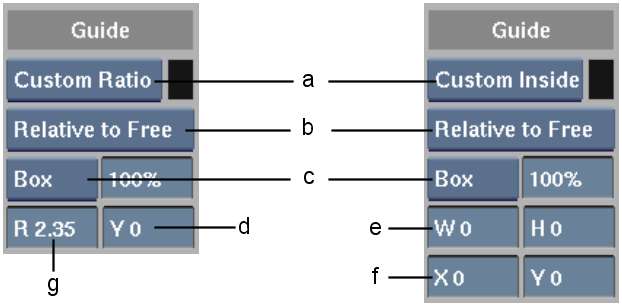
(a) Aspect Ratio box (b) Relative box (c) Overlay Type box (d) Y Offset field (e) W, H fields (f) X, Y Offset fields (g) Ratio field
| Select: | To: |
|---|---|
| Line | Indicate the working area by outline only. |
| Box | Cover the area outside the working area. |
| Select: | To define the aspect ratio guide relative to the: |
|---|---|
| Relative to Border | Frame border. |
| Relative to Work | Working area. |
| Relative to Free | Free guide. |
Safe area guides overlay the parts of the frame inside which you should keep relevant action in the shot, text, or other graphics:
Use the safe area guide controls to select default safe area guides. You can also create a custom safe area guide.
To set up default safe area guides:
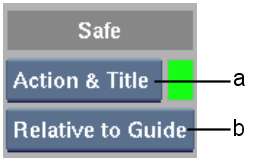
(a) Safe Area box (b) Relative box
| Select: | To view: |
|---|---|
| Safe Title | The default safe title area guide. |
| Safe Action | The default safe action guide. |
| Action & Title | Both safe action and safe title guides. |
| Select: | To define the safe area guide relative to: |
|---|---|
| Relative to Border | Frame border. |
| Relative to Work | Working area. |
| Relative to Free | Free guide. |
| Relative to Guide | Aspect ratio guide. |
To set up a custom area guide:

(a) Safe Area box (b) Relative box
| Select: | To define the safe area guide relative to: |
|---|---|
| Relative to Border | Frame border. |
| Relative to Work | Working area. |
| Relative to Free | Free guide. |
| Relative to Guide | Aspect ratio guide. |
Set up a grid of horizontal and vertical lines along the XY plane to help you place objects in a scene. You can set up a grid based on rows and columns, or on a pixel scale.
To set up a grid based on rows and columns:
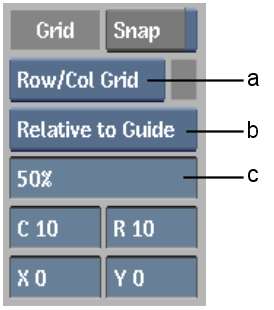
(a) Grid box (b) Relative box (c) Opacity field
| Select: | To define the grid relative to: |
|---|---|
| Relative to Border | Frame border. |
| Relative to Work | Working area. |
| Relative to Free | Free guide. |
| Relative to Guide | Aspect ratio guide. |
To set up a grid based on a pixel scale:
![]()
(a) Grid box (b) Relative box (c) W, H fields (d) X, Y Offset fields
| Select: | To define the grid relative to: |
|---|---|
| Relative to Border | Frame border. |
| Relative to Work | Working area. |
| Relative to Free | Free guide. |
| Relative to Guide | Aspect ratio guide. |
Values are in pixels, and define the number of pixels between vertical (W) and horizontal (H) lines.
Display a centre point to keep a constant reference to the centre of your clip. In most cases, the centre point is fixed relative to the frame border. However, you can offset the centre point, or set it relative to another guide.
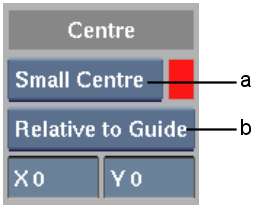
(a) Centre box (b) Relative box
| Select: | To define the centre point relative to: |
|---|---|
| Relative to Border | Frame border. |
| Relative to Work | Working area. |
| Relative to Free | Free guide. |
| Relative to Guide | Aspect ratio guide. |
In cases where you are scaling clips so they are larger than the delivery format's frame size, it is helpful to enable the frame border display. The frame border is a thin outline of the delivery format's frame size relative to the scene.