This chapter contains illustrations that demonstrate the effects of various five-frame trim operations. The numbers in the illustrations refer to the number of frames in the clip's head and tail. Before trimming, the clips in the edit sequences are numbered “H:10 - T:10,” indicating that each clip has a 10-frame head and a 10-frame tail. Changes to the head and tail count are underlined in the illustrations for emphasis. The visual indicators are for illustration purposes only.


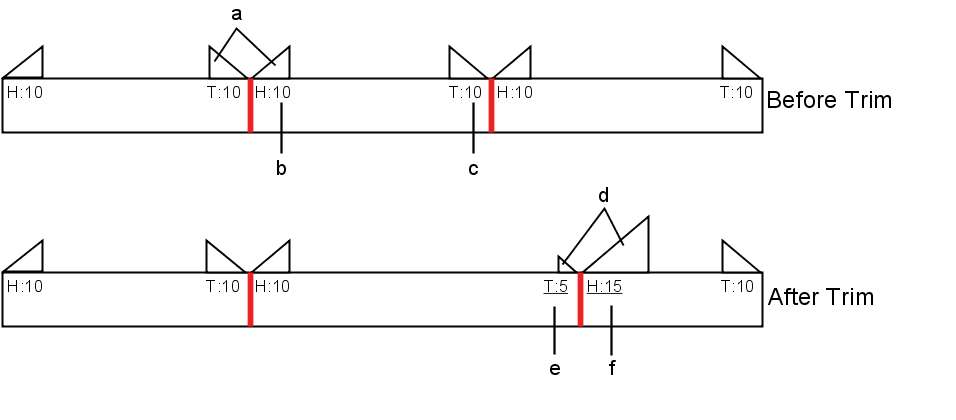
(a) Visual indicator of head/tail size (b) Indicates 10 frames are in the head (c) Indicates 10 frames are in the tail (d) Visual indicator of the change in head/tail size (e) Result of 5 tail frames trimmed into clip (f) Result of 5 frames trimmed out of clip and into the head
There are several variables that affect what happens when you perform trim operations, for example, the status of the Link Transition and Link Cut buttons, the Ripple status, and the Lock status. Most illustrations show the effect of the trim operation both when ripple is on and off, and when Lock is on and off.


