RED media can be imported
as generic EDLs containing R3D files. The workflow goes as follows.
- In WiretapCentral, from the Import menu, select
Red.
This will start a new
import job. The Import Red window appears.
- Enter a session name. Special characters
are prohibited.
The session name identifies
your import job when saving or loading a session, and when outputting
the job. It is also the job name in Backburner Manager.
- Optional: Save the session. At any time,
you can save a session. From the Session button, select Save or
Save As. Use the Session button to load a previously saved Import
Red session or delete one.
WarningSessions are saved
as cookies. Deleting your browser cookies deletes your saved sessions.
On Firefox, using the Clear Recent History option deletes the browser
cookies.
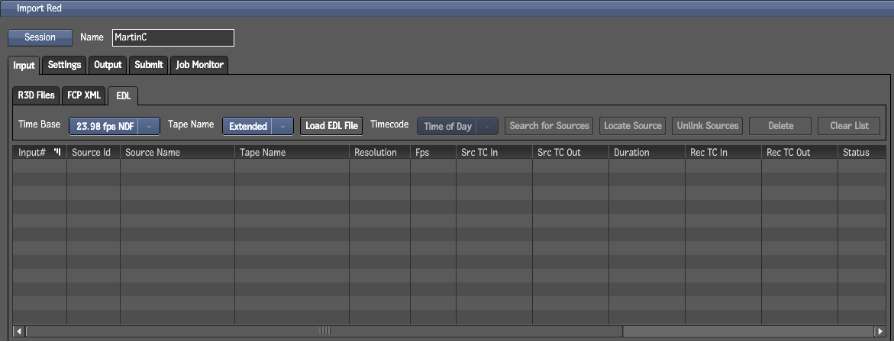
- Ensure that the Input tab is selected.
- From the Input tab, select the EDL tab.
- Select the Time Base for your EDL.
You must manually define
the timeline’s time base before importing the EDL as the EDL does
not this information.
- Select how Tape Name is written in the
EDL.
If there is a tape name
conversion, and the original tape name is written below each event, WiretapCentral shows
the correct tape name. In the end you must have both the Source
Name and Tape Name fields containing the same data.
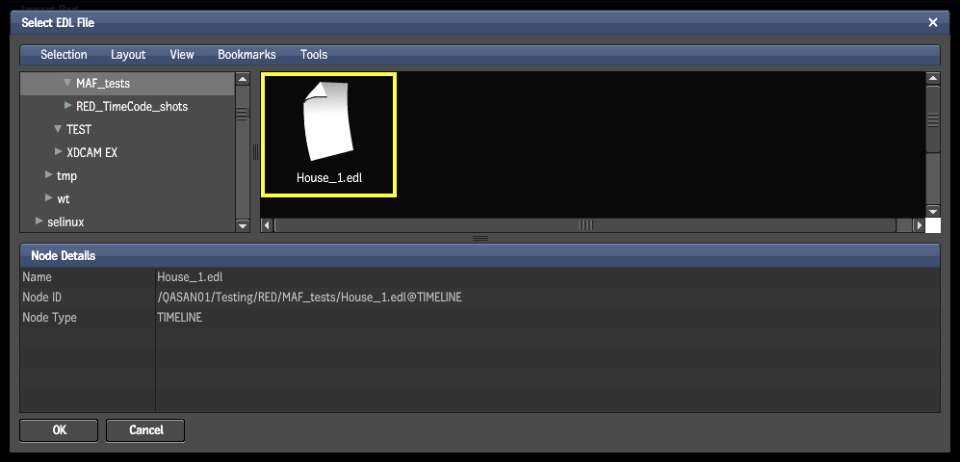
- Click Load EDL File. A browser appears.
- Navigate to the folder containing the
EDL file to be imported, and select the file.
- Click OK.
The events from the selected
EDL file appear in the Input list.
- Select the Timecode to use.
- Click Search for Sources to have WiretapCentral search
the contents of a folder for the sources. A browser appears.
- Navigate to the folder containing the
R3D files. The files themselves are not displayed.
- Select the location of the RED media
files and click OK. WiretapCentral searches the folder and all subfolders
for each clip referenced in the EDL.
In the list, the Status
of each event with a located source changes from Missing to Found.
- Optional: For each event with the Missing
status:
- Select the event for which to locate
an R3D file.
- Click Locate Source. A browser appears.
- Navigate to the R3D file, and select
it.
- Click OK to link the R3D file to the
event.
In the list, the Status
of the event changes from Missing to Found.
NoteTo verify the timecode
used: if the Src TC columns matches either Edgecode or TOD TC (time
of day) columns, the clip will be imported using the matching timecode.
If it matches neither, the clip will be imported using the primary
timecode.
- When you are ready to proceed, click
the Settings tab. See
Adjusting the Settings.