Show in Contents

Add to Favorites

Home: Lustre

Monitor Calibration Workflow

Monitor Calibration

Selecting the Project Colour Space

Adjusting Black Level and
Picture Settings
All monitors come with
controls to adjust brightness and contrast. Brightness affects the
black level setting of the monitor; contrast controls the picture
setting.
You should adjust these
settings when you first unpack and connect the monitor. When you
adjust the monitor, make sure lighting conditions in the room are
what they usually are when you are working. Adjust brightness to set
the black level first, and then adjust contrast to control the picture
setting.
You should not have to
change these settings provided you always use your system under
consistent lighting conditions. These settings are perception-based,
so do not worry about getting perfect results. In the end, you are
trying to ensure that black looks black and white looks white.
Brightness (black level)
offsets the red, green, and blue signals. Adjust the black level
to display black as black without losing the distinction between black
and very dark greys. Note the following:
- When the black level is too high, true
black appears slightly grey.
- When the black level is too low, dark
greys appear black, so you lose subtle details in shadows.
Contrast (picture setting)
applies gain to the red, green, and blue signals. Adjust the picture
setting to display white properly on the monitor. Note the following:
- If the picture setting is too low, white
appears off-white on your display.
- If the picture setting is too high, very
light grey is the brightest colour the monitor displays, so you
lose subtle detail in highlights.
For more information
about adjusting the black level and picture settings of your monitor,
read Charles A. Poynton's monitor adjustment guide at:
http://www.poynton.com/notes/brightness_and_contrast/index.html
To adjust the black level setting:
- Start Lustre.
- Load a black frame (RGB 0, 0, 0) to the
Storyboard. See
Moving Shots to the Storyboard.
The black frame appears in the Player. Use this
image to set your black level.
TipYou can also create a black frame (RGB 0,
0, 0) in the Curves menu by dragging the RGB curves down.
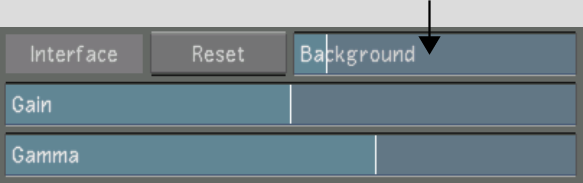
- In the Main menu, click Setup, and then
click Interface to display the Interface menu.
- Set Background to the default value of
30.
A value of 30 creates a subtle contrast between
the background colour and the black frame.
- On the monitor, set Contrast to the minimum
value.
- On the monitor, set Brightness to the
minimum value.
- Slowly increase Brightness on the monitor
to increase the black level. When the black image appears lighter
than the surrounding background, stop increasing brightness and
then decrease it a little.
You should have a good black level value.
To adjust the picture setting:
- Adjust the black level as described in
the previous procedure.
- Load a white frame (RGB 1023, 1023, 1023
in Log mode) to the Storyboard. See
Moving Shots to the Storyboard.
The white frame appears in the Player. Use this
image to set your picture settings.
TipYou can also create a white frame (RGB 1023,
1023, 1023) in the Curves menu by dragging the RGB curves up.
- In the Main menu, click Setup, and then
click Interface to display the Interface menu.
- Set Background to the default value of
30.
A value of 30 creates a good contrast between
the background colour and the white frame.
- On the monitor, set Contrast to the maximum
value.
- Slowly decrease Contrast on the monitor
to adjust the picture setting. When you begin to see that the white
frame turns light grey, stop decreasing contrast and then increase
it a little.
TipIf anything, err on the side of dark. Sensitivity
to monitor flicker increases with the Contrast value. For the most
part, the end result of monitor adjustment processes should be good
blacks and whites on a screen you are comfortable looking at.