When you want to add credits to a cut loaded to the timeline, you can automatically key text files containing an alpha channel over shots in the timeline. To do so, use a text plate EDL that describes how the text files are arranged in the timeline.
To use a text plate with a cut, the text plate file must use a .cutplate extension, as well as have the same filename as the .cut file you are using. For example, a text plate for movie.cut would be named movie.cutplate. Store the cut plate for the text files in the sacc_data directory—where the loaded cut file is stored. Store the text files in the same scene's sacc_data\plate directory.
The following is an example of a text plate EDL.


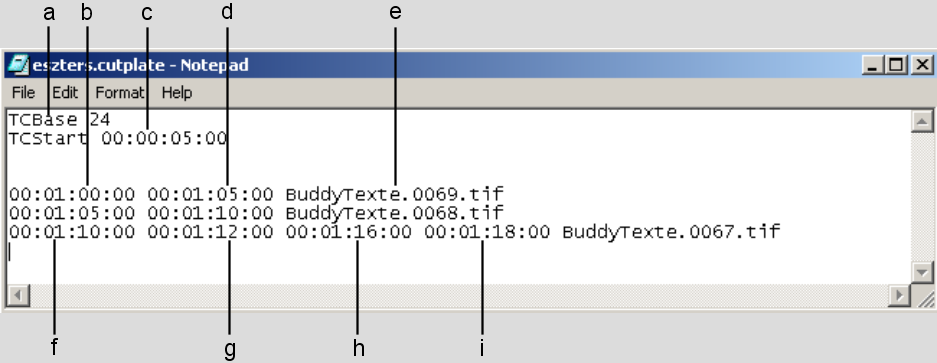
(a) TCBase (frame rate) (b) Record in timecode (c) TCStart (timecode offset) (d) Record out timecode (e) Text file name (f) Record in timecode and start of fade-in (g) Fade-in end timecode (h) Fade-out start timecode (i) Record out timecode and end of fade-out
The text plate EDL contains the following timecode information.
TCBase Set the frame rate. You can set the frame rate to any rate, such as 24, 25, or 30 fps.
TCStart Offset the timecode to slip the entire timeline. For example, 00:00:05:00 would slip the text plate 5 seconds earlier in the timeline.
MaxColor Set the colour intensity from 0-1023, where 0 is black and 1023 is white. If this value does not appear in the EDL, the value defaults to 800.
Timecode List the record timecode for each referenced text file. Set the record in timecode and record out timecode, as well as durations for fade-ins and fade-outs.
Use the Text Plate menu to turn text plates on or off.
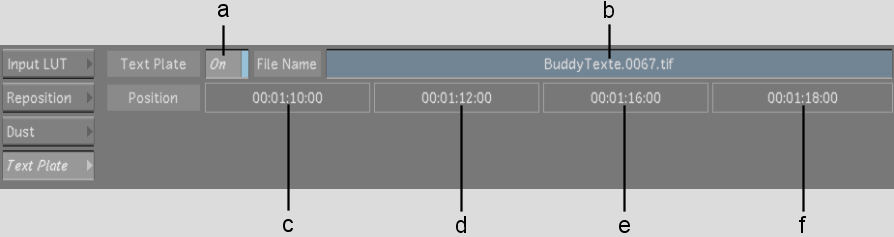
(a) On/Off button (b) Text file name (c) Record in timecode and start of fade-in (d) Fade-in end timecode (e) Fade-out start timecode (f) Record out timecode and end of fade-out
The Text plate is keyed over the shot in the Player. When the text plate is on, you can render the cut with the text plate.
(a) On/Off button (b) Text file name (c) Record in timecode and start of fade-in (d) Fade-in end timecode (e) Fade-out start timecode (f) Record out timecode and end of fade-out
The text plate is turned off and no longer appears in the Player.


