Chapter 7, Editing
| Replacing Shots | Adding a Virtual Black Clip using the Storyboard | ||
Chapter 7, Editing |
|||
 Creating Additional Handles for Dissolves
Use dissolves to create a gradual blend between two shots. A dissolve is a transition that causes the outgoing shot to gradually disappear at the same time as the incoming clip gradually appears. Depending on the number of available handles, you can use dissolves to create long, gradual changes, or you can create dissolves with short durations (called soft cuts).
Note: Centre dissolves are created automatically if you import an EDL that contains dissolves. However, other transitions, like wipes, are replaced by straight cuts.

You can add a dissolve between two shots provided that there are a sufficient number of underlying handles.
Note: All dissolves in Lustre are centre aligned.
Click Editing, and then click Edit.
The Edit menu appears.
 "Show full-size image")
|
|
|
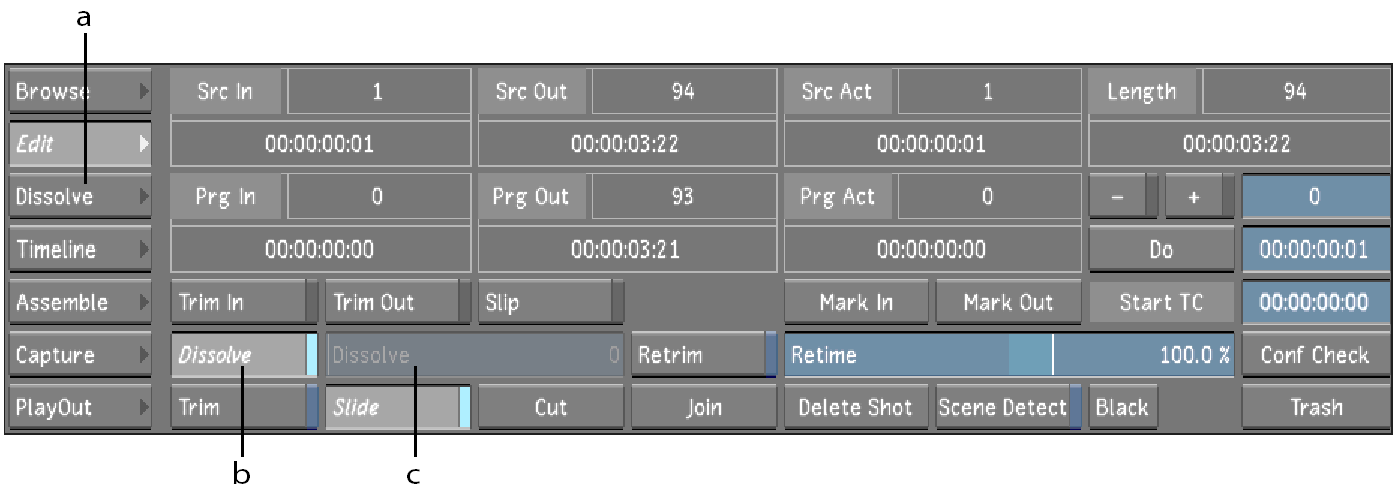
Select the shot to the left of the cut to which you want to add a dissolve.
Note: You must have sufficient handles to add a dissolve. If you do not, use the Retrim tool. For more information, see Creating Additional Handles for Dissolves.
Enable Dissolve, and then drag the Dissolve slider to set the dissolve duration.
To edit the shape of the Dissolve curve, see Editing Dissolves.
You can change the duration of a dissolve at any time.
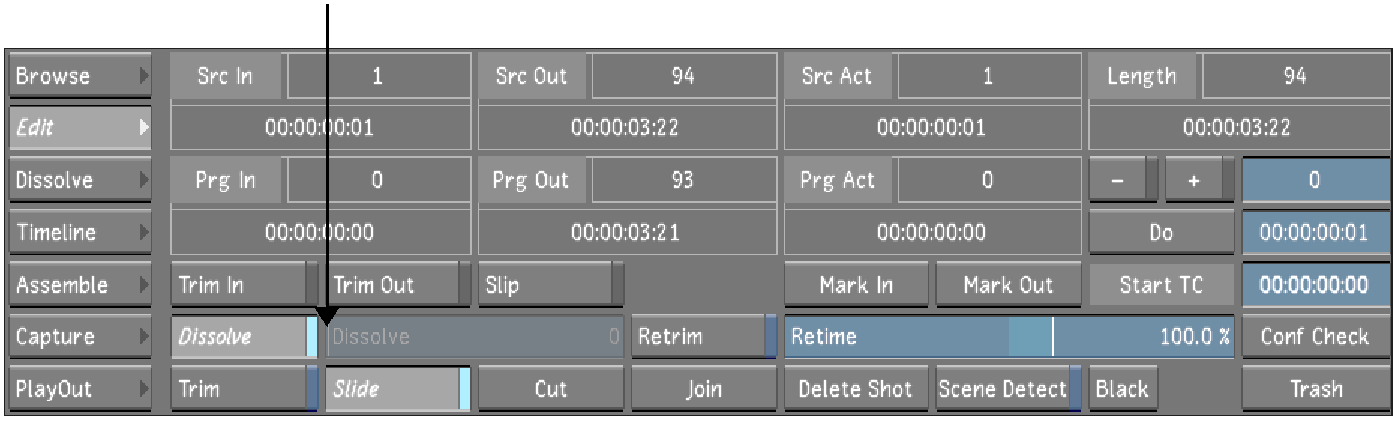
Select the shot to the left of the dissolve.
In the Edit menu, drag the Dissolve slider to adjust the dissolve duration or right-click the slider for the pop-up entry.
 "Show full-size image")
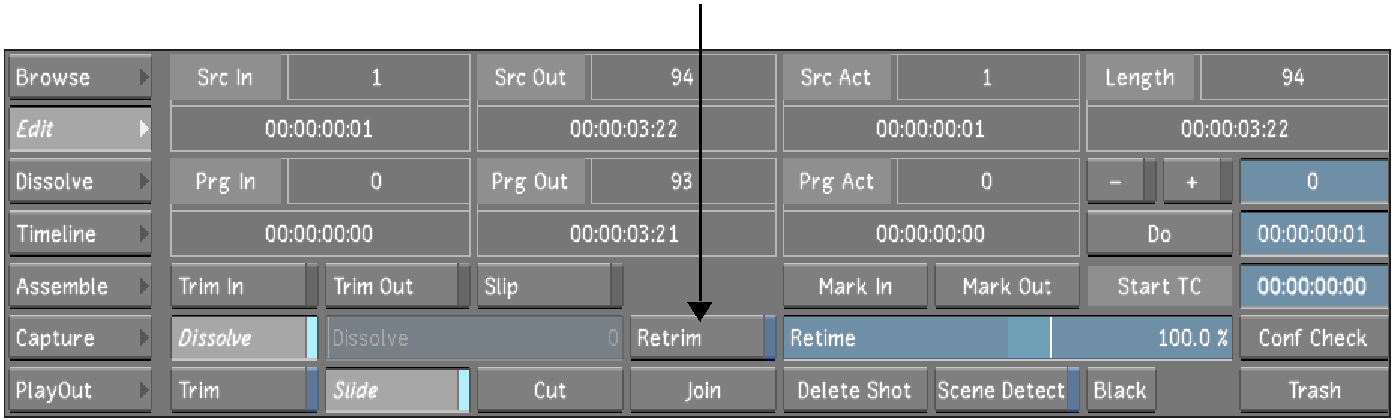
You can trim handles from outgoing and incoming shots and use them to add a dissolve.
In the Storyboard, select the shot to the left of the cut point to which you want to add a dissolve.
In the Edit menu, enable Retrim.
 "Show full-size image")
Enable Dissolve, and then drag the Dissolve slider to set the duration or right-click the slider for the pop-up entry.
Frames are automatically trimmed from the tail of the outgoing clip and the head of the incoming clip.
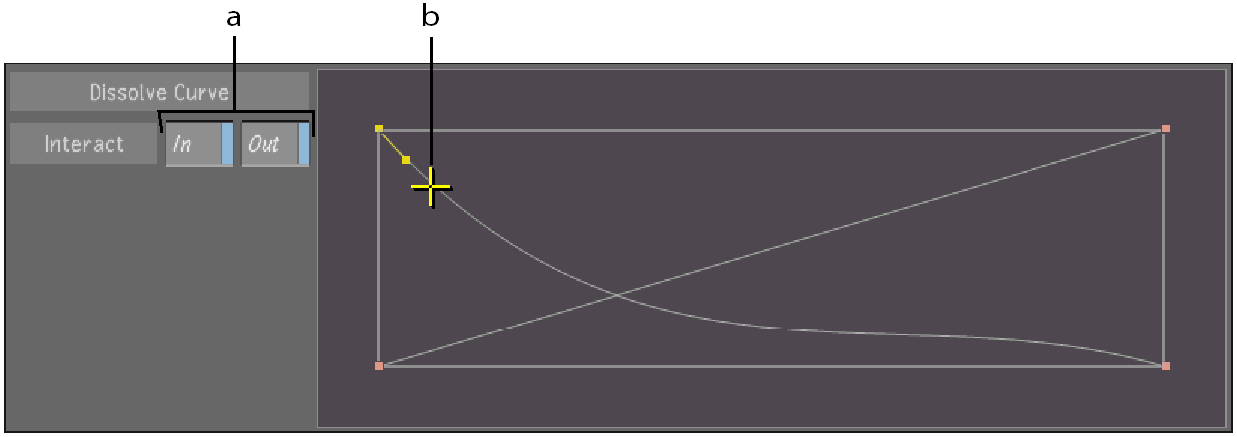
Use the Dissolve Curves window in the Dissolve menu to edit the rate at which the dissolve changes. There are two curves: one represents the outgoing shot and the other represents the incoming shot. These curves are plotted on a graph that shows Time vs. Percent Visible. When curves are at the top of the window, the frames at that point in time are 100% visible. Curves near the bottom correspond to 0% visible frames.
By default, each curve progresses in a linear fashion from one corner of the window to the opposite corner.
In the Edit menu, click Dissolve to display the Dissolve menu.
Enable Interact In or Out to specify whether you are modifying the outgoing or incoming frames of the dissolve. You can also work on both curves simultaneously.
 "Show full-size image")
|
|
Click one of the keyframes and drag the Bezier handle to adjust the rate at which the dissolve takes place.
You can change the start or end visibility to any value between 0-100%; however, you cannot adjust the time at which a dissolve starts or ends in the Dissolve Curves window. To do this, return to the Edit menu and use the Dissolve slider.
Use the Dissolve button in the Edit menu to toggle a dissolve on and off.