Decals have material
properties similar to all other materials, but they also have a
decal texture (an image map) and a texture location (represented
by the decal grip). Each of these properties affects the appearance
of a decal on objects.
Change the decal texture
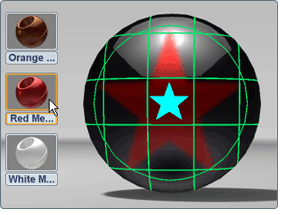
- Select the grip of the decal
you want to change. The objects with that decal applied are highlighted
in green, while the grip is highlighted in blue.
NoteYou must select the grip for the decal to
edit its properties. Selecting an object with a decal will not select
the decal, and editing its material properties will change the underlying
“base” material. (For more information, see
Select and re-order decals.)
- Select Material > Material
Properties (or press Ctrl+M).
NoteThe Material Properties
window appears.
- The
first property is the Decal image map being
used. (For new decals, this defaults to a star image.)
NoteTo better see the
decal as you update its properties, click the Hide
selection highlighting checkbox in the Material
Properties window.
- Browse to the image you wish to use as
your decal texture.
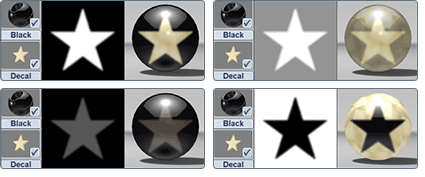
Darker areas of the decal
image map produce a transparent material, while brighter areas create
a more opaque appearance. (White shows 100% of the decal material,
and black shows the material below.)
- If your texture image appears to be distorted
or stretched on your objects, change the mapping type or press the Autofit button
below the Mapping settings.
For more information on mapping this texture
on your object, see
Apply image maps.
NoteYou can select several
decal grips with different materials and change the Decal texture
for all of them at once.
Change common material properties
- Select
the grip of the decal you want to change.
- Select Material > Material
Properties (or press Ctrl+M).
The Material Properties window appears.
The controls available in this window are the
same for all decals. As you adjust their values, you can see the
decal material change in the scene.
Replace common material properties
To replace the common
material properties (Color, Highlight, Reflectivity, Transparency, and
Bump) of a decal, but retain the current decal image map texture
and placement, apply an existing material to the decal grip.
- Select the grip of the decal whose common
material properties you wish to replace.
- Press the M key
(or select Material > Materials).
- Click on the material or decal whose
common properties you wish to use.
The selected decals will now use the values
of the replacement material for Color, Highlight, Reflectivity,
Transparency, and Bump.
TipYou can select multiple decals and replace
the common material properties of all of them by selecting any material
in the library or scene. They will retain their individual decals
and placements, but have the same material properties.