If size discrepancies exist between your source character and your target character, you can adjust the Retarget Specific attributes to fine tune your retargeting result.
This file can be found in the GettingStartedMaya2013LessonData\HumanIK directory that you set as your Maya project.
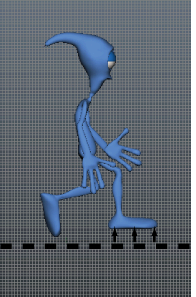
Two HumanIK defined characters appear in the Maya scene, the target character (Pepe), and the source character (WalkExample).
By default, the target character (Pepe) is acting in its own action space (where the character performs motion), which automatically compensates for the scale difference between the source and target characters. However, in this example, the retargeting does not take into account that Pepe's foot proportions are also different. Since his feet are longer than WalkExample's feet, the retargeting result is affected. For example, at frame 1 Pepe's right foot penetrates the ground and his stride is very short.

Several Retarget Specific attributes can be adjusted to account for differences in scale and proportions between your source and target characters.
To use the Match Source property
 > Edit > Definition > Edit Properties.
These attributes let you define special settings for your target character.
When turned on, this property makes the target character act in the source character's action space, enabling you to reach the IK Blend goals of the source.
By default, the IK Blends (IK Blend T and IK Blend R) on Pepe's hips and feet are set to 1.00, which inidcates that these body parts are reaching toward WalkExample's body parts.


Pepe's hands reach the source character's hand positions.


After increasing the scale, Pepe is significantly larger and his hands closely match the position of WalkExample's hands. This illustrates that IK Blend goals of the source character are reached differently depending upon the scale of the target character.
> Edit > Definition > Edit Properties), turn Match Source Off because the result of this adjustment is undesired for this example.
We can adjust other attributes to achieve a more realistic stride for Pepe.
Let's adjust other properties to achieve a more realistic stride for Pepe.
To achieve a realistic stride for Pepe
This attribute lets you set an exact value to determine how retargeting is scaled to compensate for different sizes in your source and target characters.
Maya applies this value as a percentage to the size of all movements carried out by the source character when determining positions for the target character. The higher the value, the longer the character's stride. The smaller the value, the smaller the stride.
Since the Action Space Compensation value is low, Pepe's stride is still very short.
Pepe's stride is significantly longer when we apply a User defined value instead of keeping the default Auto setting. We can see this improvement at frame 54:

Setting only this attribute gives us a good retargeting result. Now that we've fixed the stride, we can look at other properties that can help us achieve a good retargeting result.
To adjust retargeting using other properties
By default, Auto mode ensures the feet relate correctly to the floor. When set to Off, ankle height compensation is disabled. When set to User, you can adjust the distance between the model's feet and the floor manually by setting the Ankle Height Compensation value.
This value adjusts the distance between the character's foot and the floor. This value is often adjusted when your character has special height requirements (for example, shoes with high heels or boots) or your character's feet are very large.
Other Retarget Specific attributes
The following attributes let you further refine your retargeting result.


