


In these steps you model a 2D curtain rod from a plane and attach hair to it. Then you add and keyframe a sphere in the scene to later be used as a collision object.
To create the curtain using Hair
(If you have previously shut off the interactive primitive creation option, simply click once in the scene to create the primitive at the origin.)
 , resize the plane in the X direction as shown in the image below.
 , set the following options and then click Create Hairs:
 Hair is created and attached to the plane.
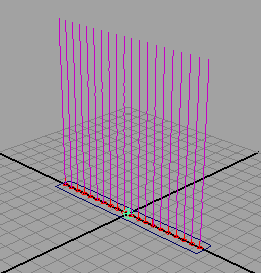
 , rotate the plane so the hair appears to be on the underside of the plane. Then, using the Move Tool
 , move the plane up the Y axis so the bottom of the hair just touches the ground plane, as shown in the following image. (Ensure
you do not select the hair when selecting the plane.)
, move the plane up the Y axis so the bottom of the hair just touches the ground plane, as shown in the following image. (Ensure
you do not select the hair when selecting the plane.) 
 + a) go to the Directional Light Attributes section and change the Intensity value to 1.5.

The sphere passes through the curtain as though the curtain weren’t there. In the next steps you set the sphere as a collision object with the hair.
